
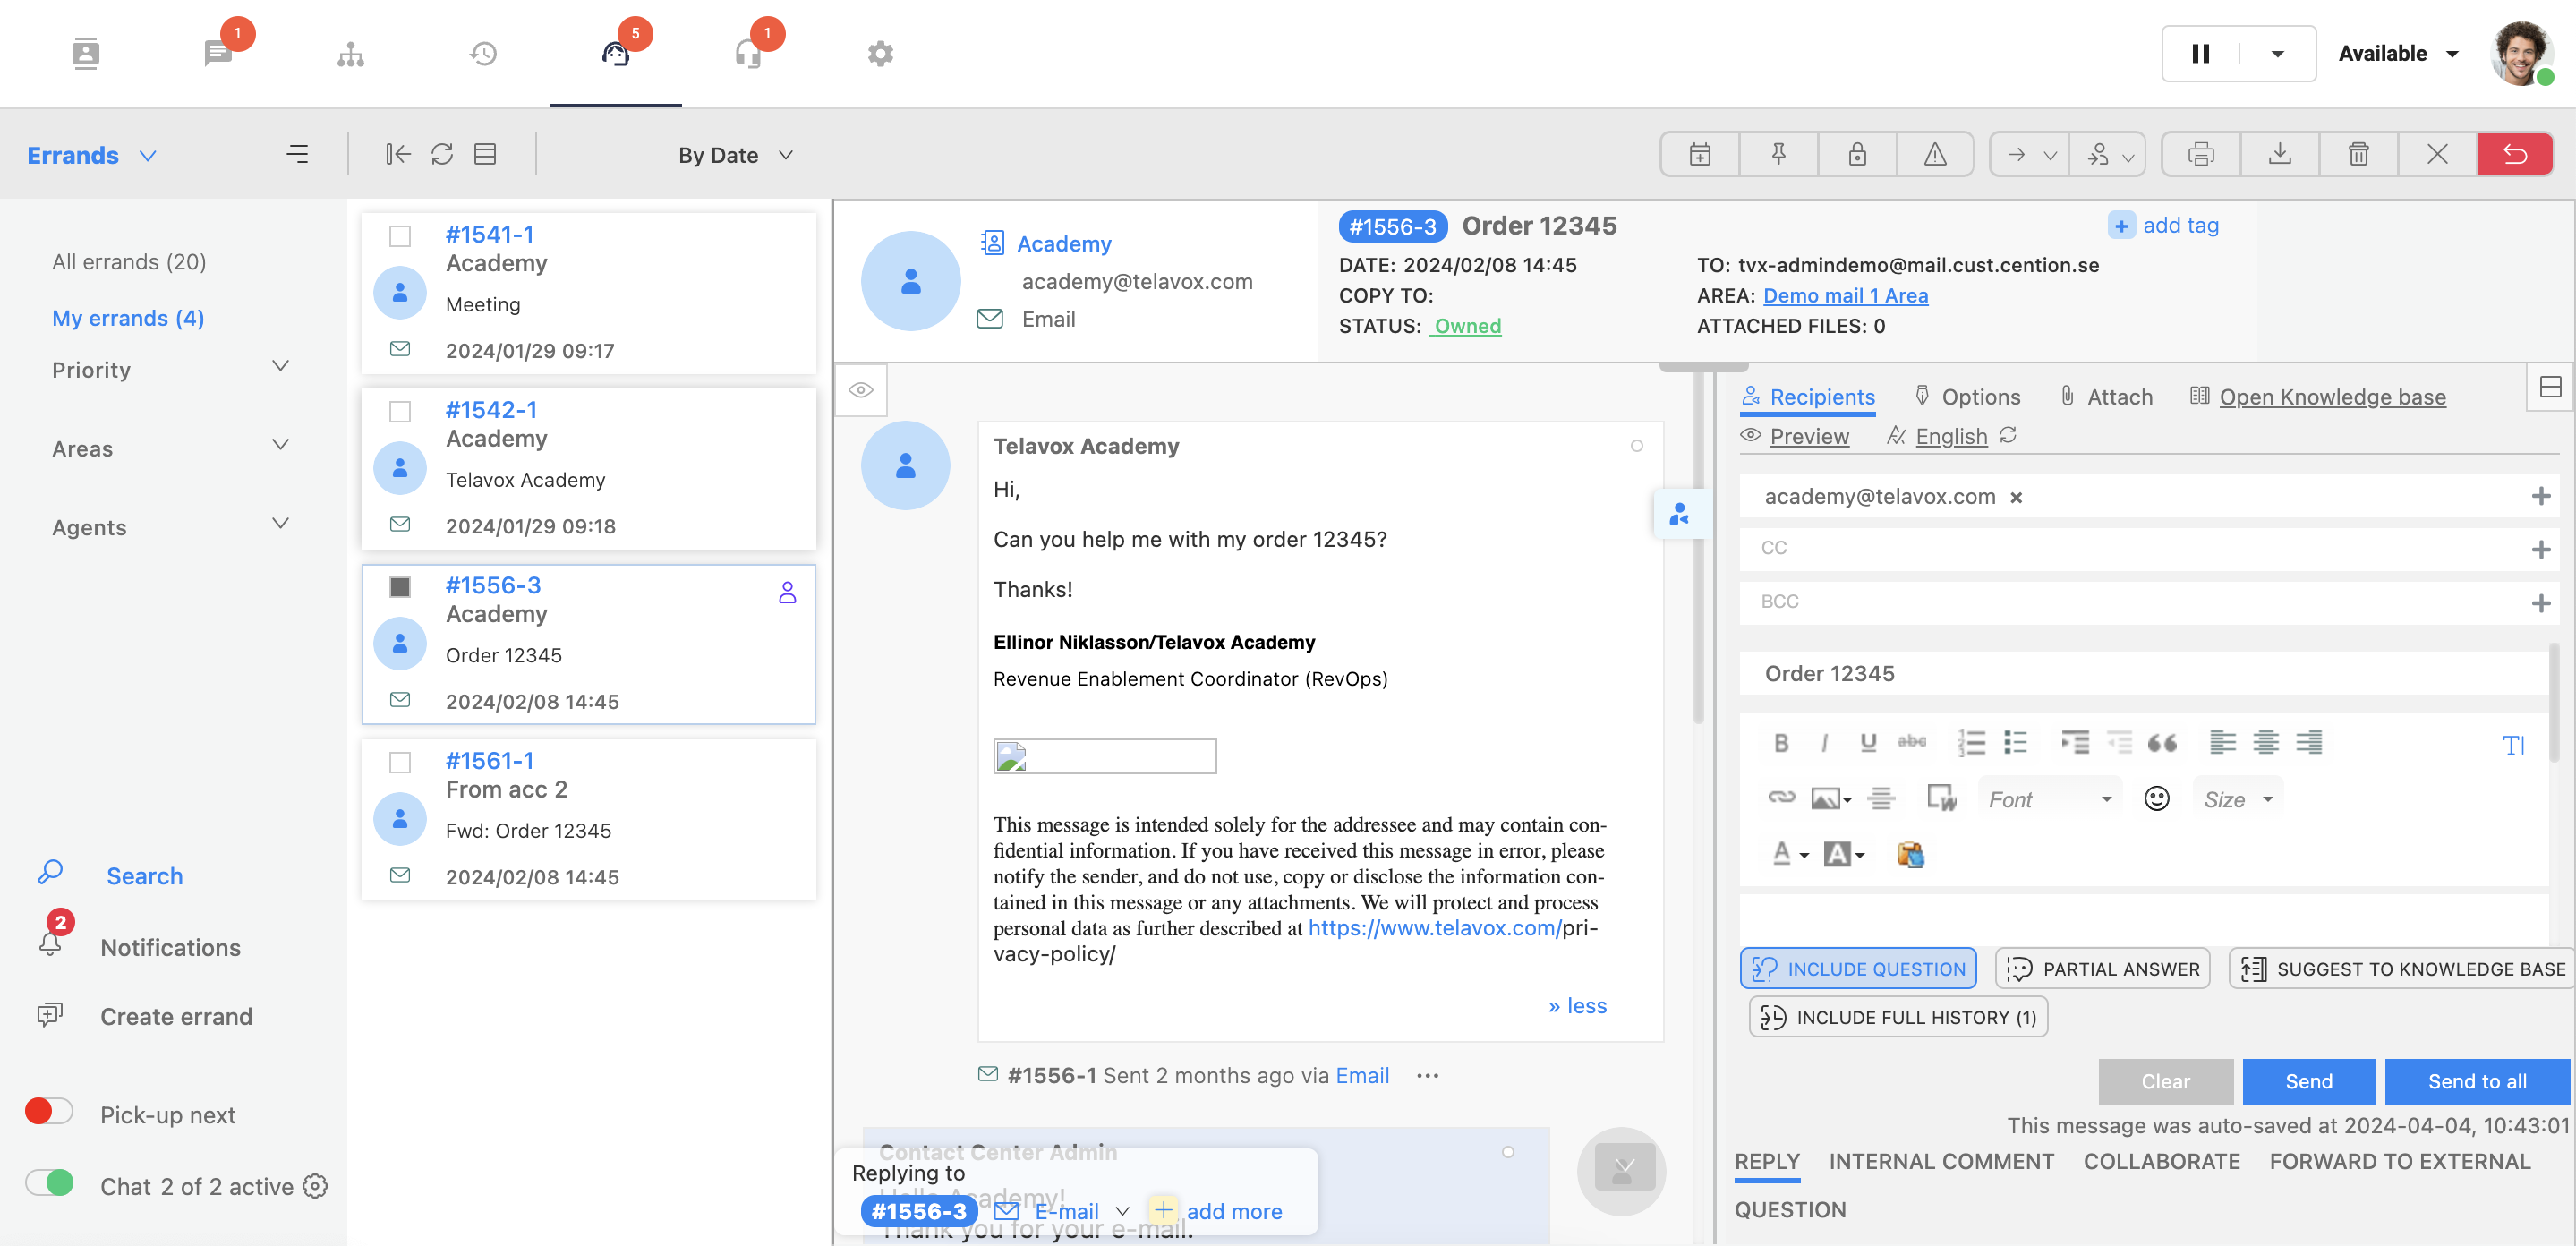
The first thing you see after opening an errand is this view. Here, you will find a lot of information regarding the errand. We will go through the most important sections in this article.
Read more about errands and the different features you can use in the Telavox Omnichannel by clicking on the tabs below:
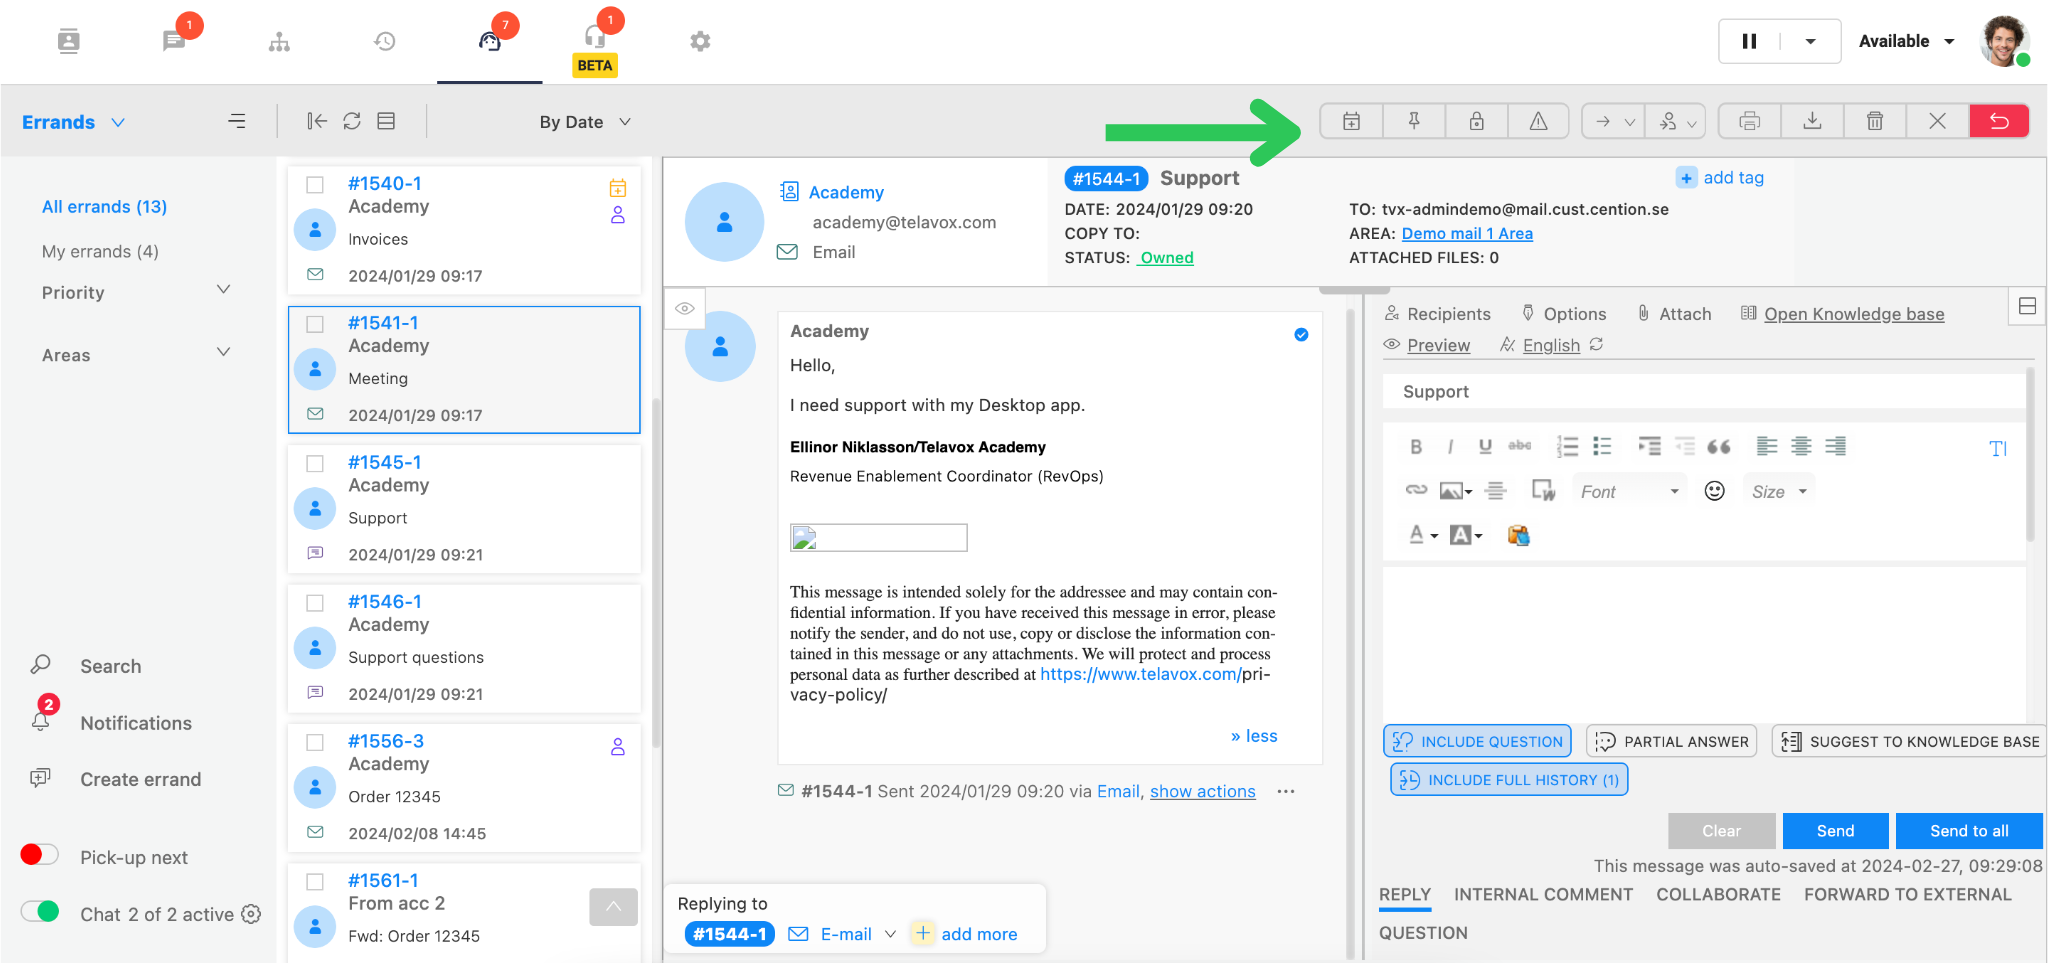
The filter bar
- Pin to top: The Errand is pinned to the top of your errand list regardless of the waiting time.
- Lock to me: You can lock the errand to yourself as an agent. This means that if the customer mails the same errand, it will go to the agent’s inbox instead of the general inbox, which can increase the effectiveness and quality of the handling.
- Forward to area: You can move and forward an errand to a different area.
- Forward to agent: You can forward the errand directly to an agent’s inbox. For example, if that agent has previously worked on that errand.
- Delete errand: The errand is deleted and will not affect the statistics. For example, if a spam email has ended up in your inbox.
- Close errand: The errand is closed and marked as handled.
-
Return errand: The errand is returned to the general inbox it came from, which makes it accessible for your colleagues.
Errands
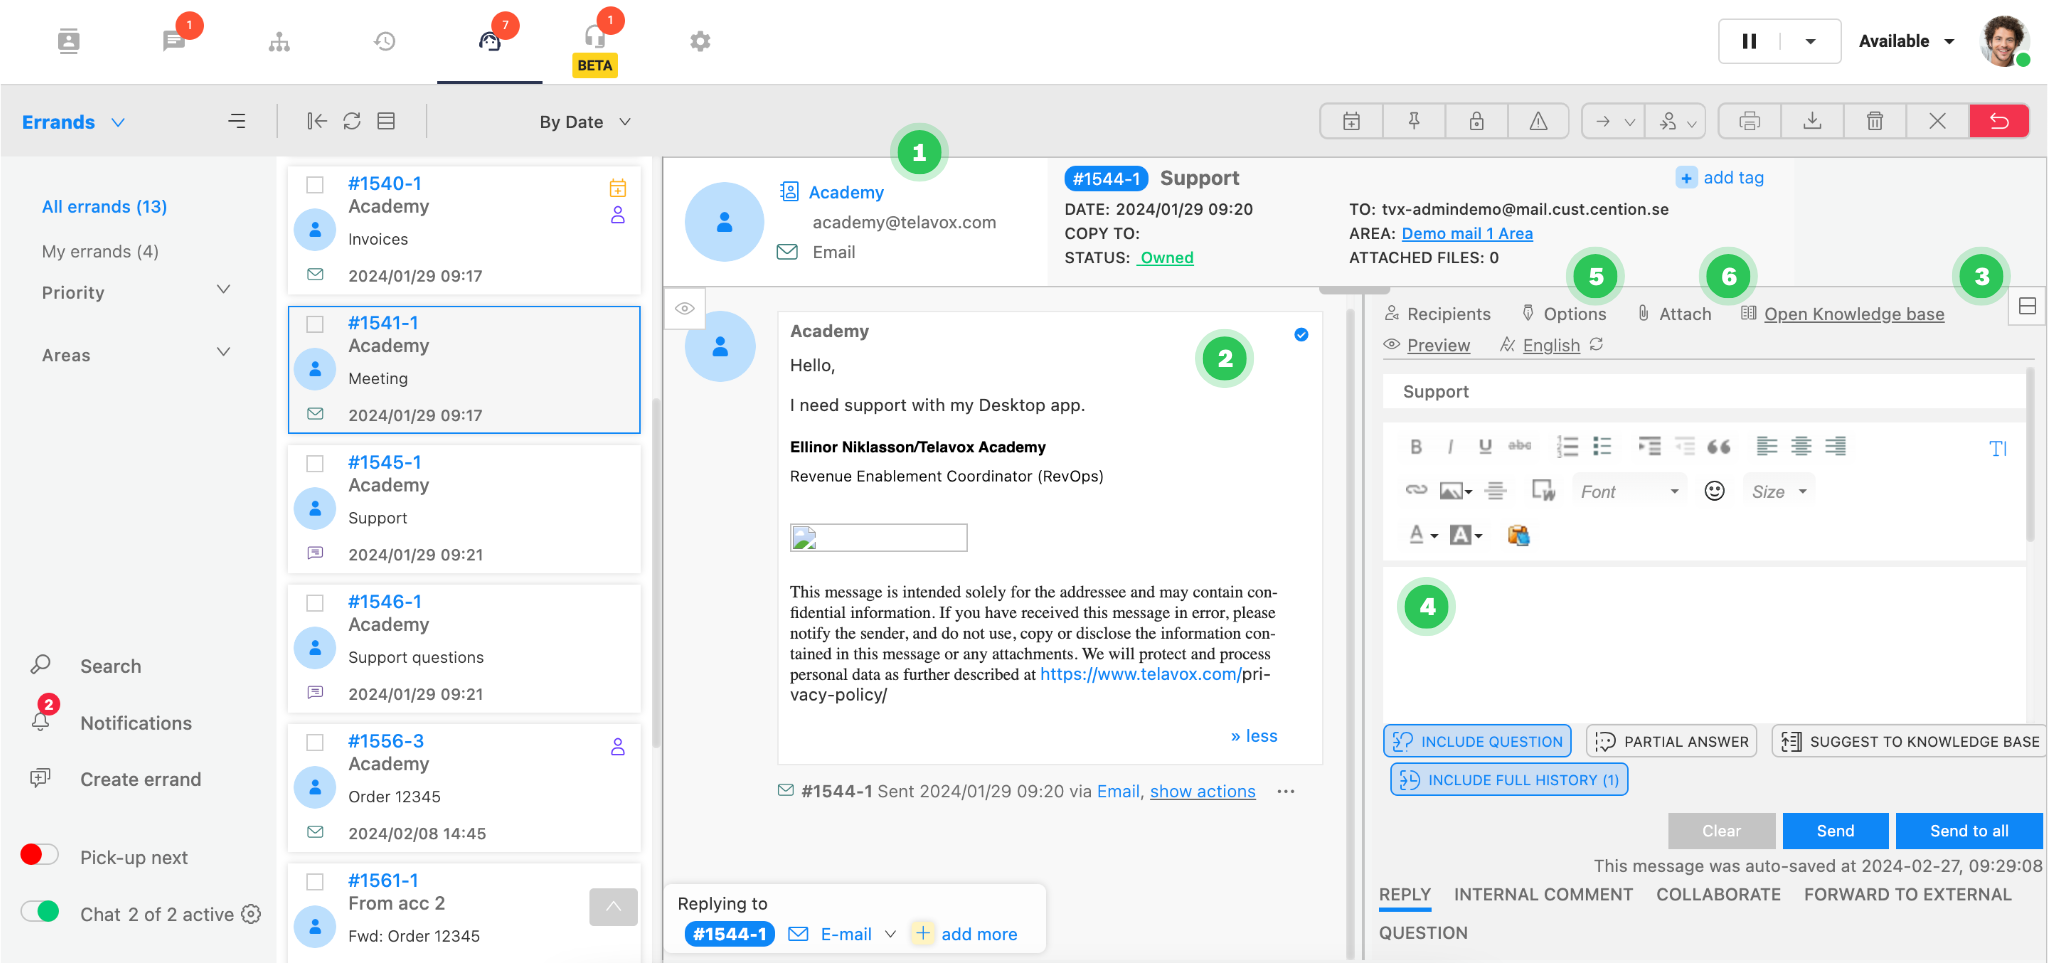
Under your errand with your customer you can, for example see:
- Who has sent the mail and any attachment files
- The dialogue and history of the errand
- In the right box, you have the answering box. There, you can see who is the receiver of the mail and add copies via CC, etc.
- In the big white box, you write your answer to the customer. Some functions are similar to Outlook/Gmail, and we also see some options at the top of the box
- You can change the signature and use templates in Options
- Under Attach, you can attach files to the errand
- Once ready, you can send a reply to the customer by clicking on Send
Features within the errand
As you can see in the picture below, we have some alternatives other than only answering the customer.
For example, you can:
- Internal comment: You can publish an internal comment which can only be seen internally. Add information that can help a colleague with handling the errand
- Collaborate: Here, you can collaborate with an internal or external person if you need help with solving the errand. An example is that you might need to get an update from a delivery company about a delivery. Then you can collaborate with them and you have all the information connected to one errand. The conversation in the collaboration is not seen by the customer. It’s only seen internally and with the person you are collaborating with
-
Forward to external: Here we can do a traditional forward. This function is used if you want to forward an errand and drop the ownership of it. In other words you should not continue the dialogue with the customer
.png)
Knowledge Base
You can create a knowledge base with information which you can access via Open knowledge base. There you can find information and responses you have put into the knowledge base. You can also add these responses directly in the article by simply selecting the article you want to use and by clicking Use.

Tags
To keep track of common customer inquiries, you can tag errands. You can do this by simply clicking Add tag in the errand's top right corner:

There you can search for the tag you want to use, or then click through categories created for the tags and find the tag from there.
Delete

Calls and errands
Good to know, is that when your customer calls to a specific queue which is connected to the Omnichannel solution, an errand is created automatically in the Omnichannel. When you have answered the call, click on the Go to errand button to go to the errand itself - and start working on the errand as you would always do!
