Nauhoitettujen puheluiden hallinta hallintaportaalissa
Nauhoitetut puhelut on ominaisuus, joka voidaan lisätä käyttäjille ja jonoihin, jotta heidän puhelunsa nauhoitetaan. Järjestelmänvalvojat ja käyttäjät voivat sitten valita, minkä profiilien aikana käyttäjän tulisi ottaa puheluiden nauhoitus käyttöön. Artikkelissa Nauhoitetut puhelut on vaiheittainen opas tallennettujen puheluiden aktivoimiseen käyttäjätasolla.
Järjestelmänvalvojana voit kuunnella kaikkien käyttäjien ja jonojen nauhoitettuja puheluita suoraan hallintaportaalissa.
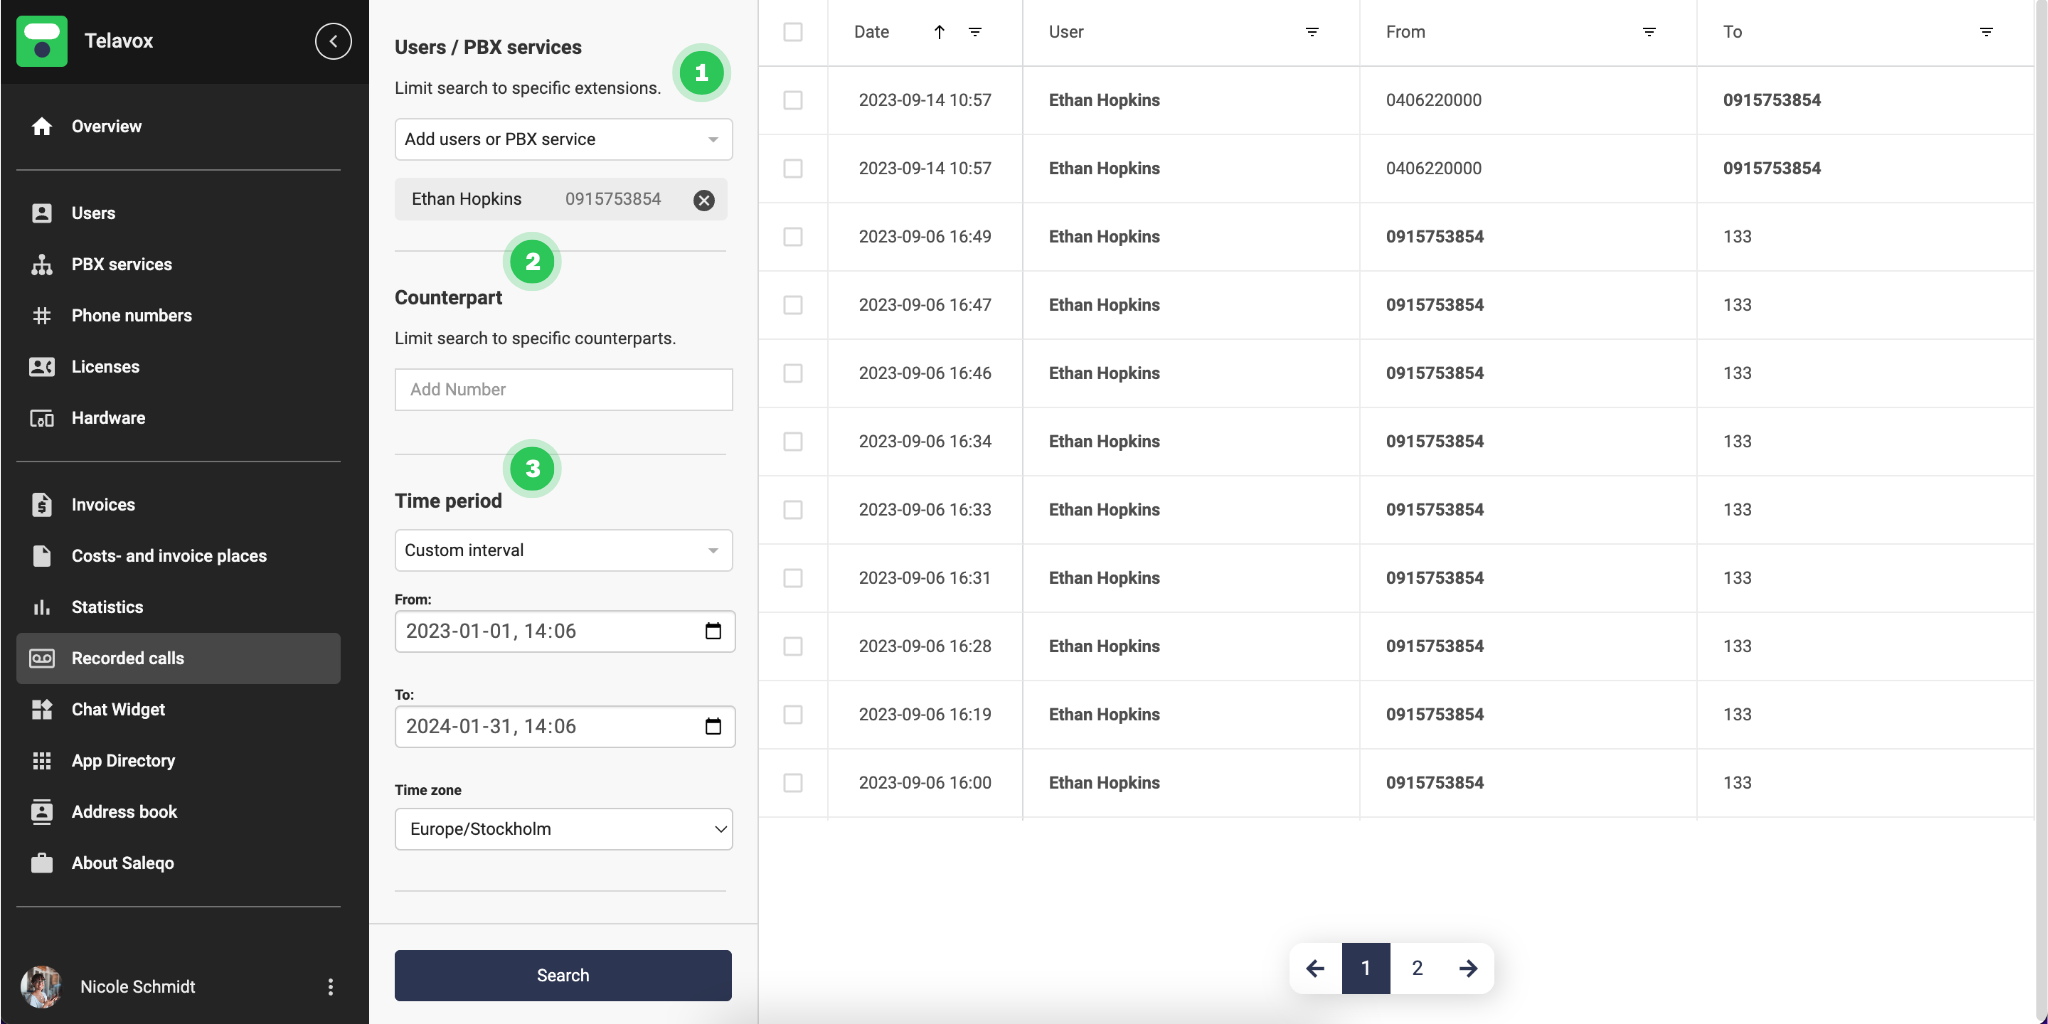
- Valitse ensin käyttäjät tai PBX-palvelut, joihin haluat aktivoida Nauhoitetut puhelut -ominaisuuden (voit myös valita useita käyttäjiä ja jonoja samassa haussa)
- Kohdassa Vastapuoli voit kirjoittaa numeron, jonka nauhoitetut puhelut haluat nähdä (tämä tarkoittaa, että voit hakea, onko tietty numero soittanut tietylle käyttäjälle tai jonoon)
-
Aikajakso-kohdassa on viisi eri vaihtoehtoa:
- Viimeiset 24 tuntia
- Viimeiset 7 päivää
- Viime kuukausi (yksi kuukausi ajassa taaksepäin)
- Mukautettu aikaväli (tiedot tiettyyn päivämäärään ja siihen mennessäsoitetuista puheluista)
- Rajoittamaton (kaikki tiedot kaikilta ajoilta) -
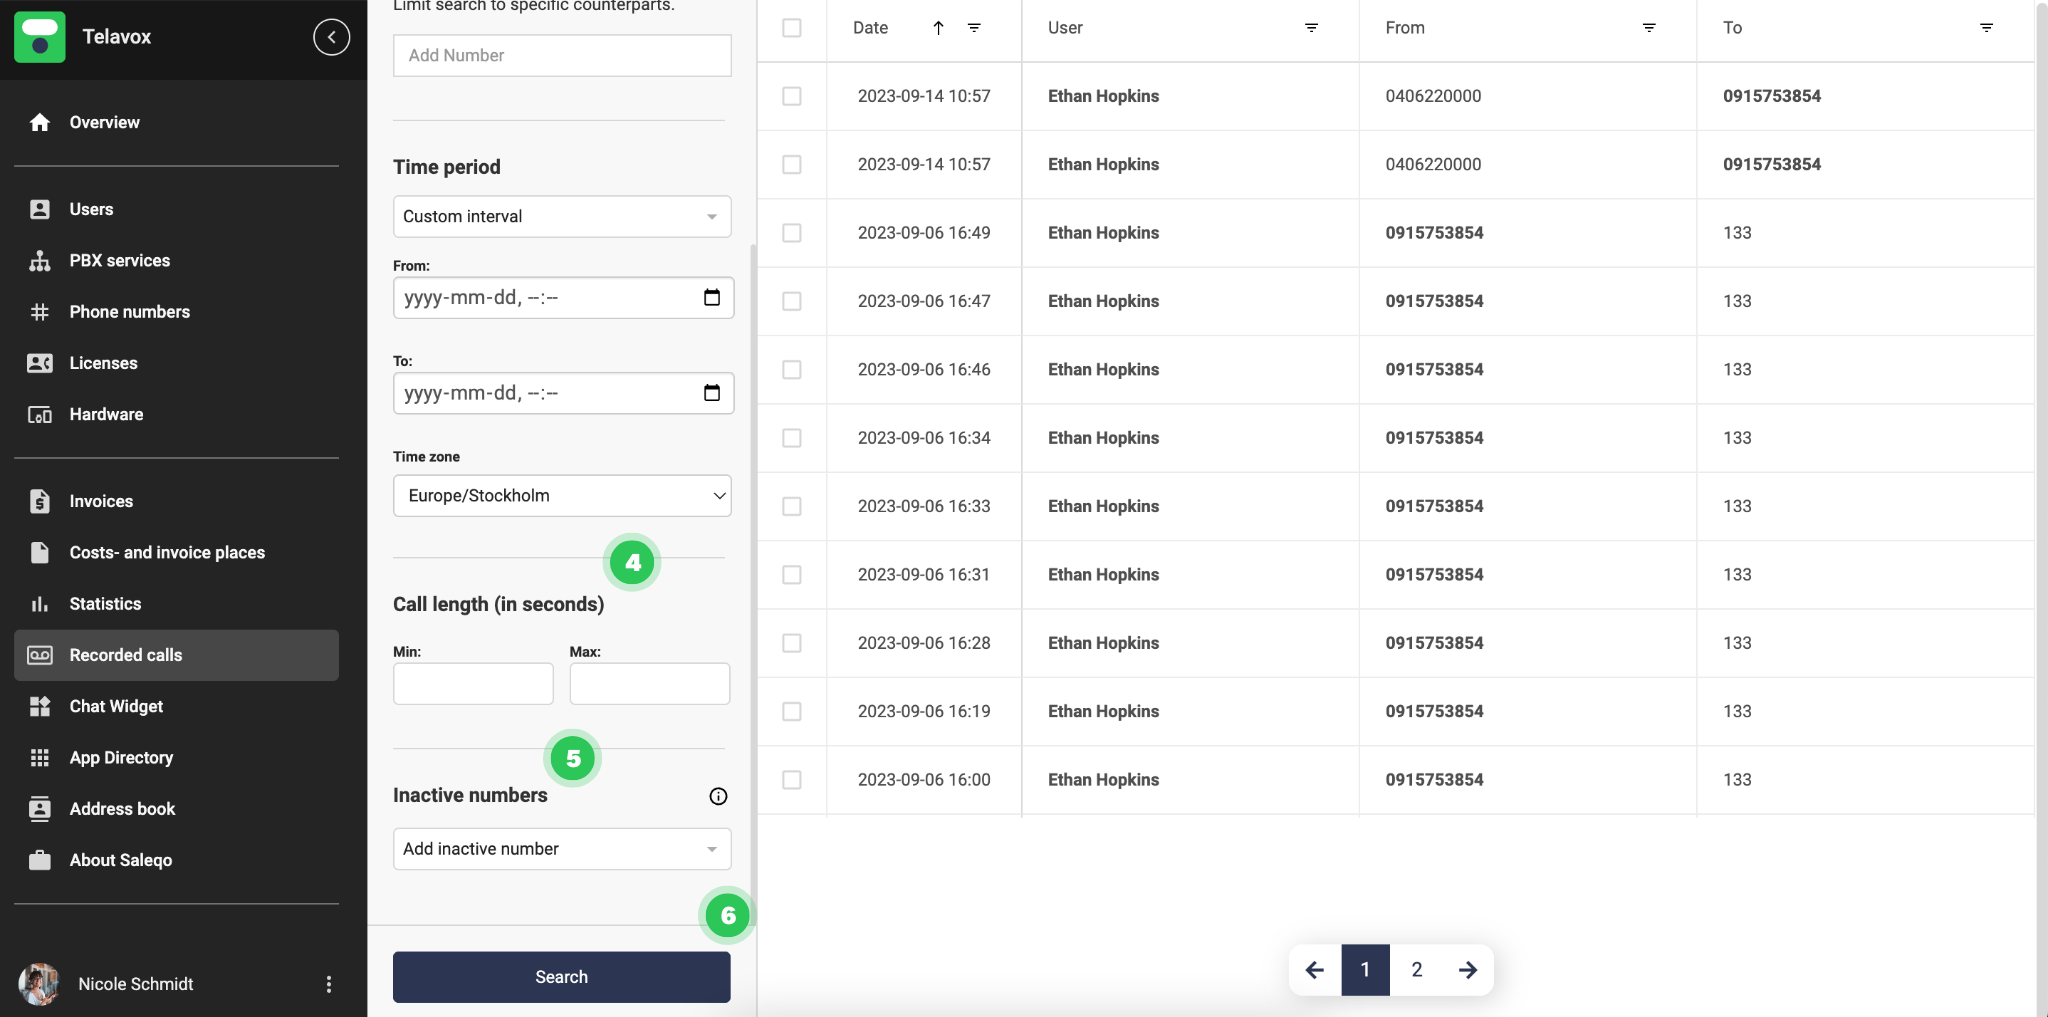
 Kohdassa Puhelun pituus (sekunneissa) voit valita puhelun vähimmäis- ja enimmäispituuden (jos jätät kentän tyhjäksi, saat kaikki puheluiden pituudet)
 - Voit myös hakea hakusanalla Inaktiiviset numerot, joka tarkoittaa numeroita ja käyttäjiä, jotka on poistettu ympäristöstäsi
- Kun olet valmis, napsauta kohtaa Hae
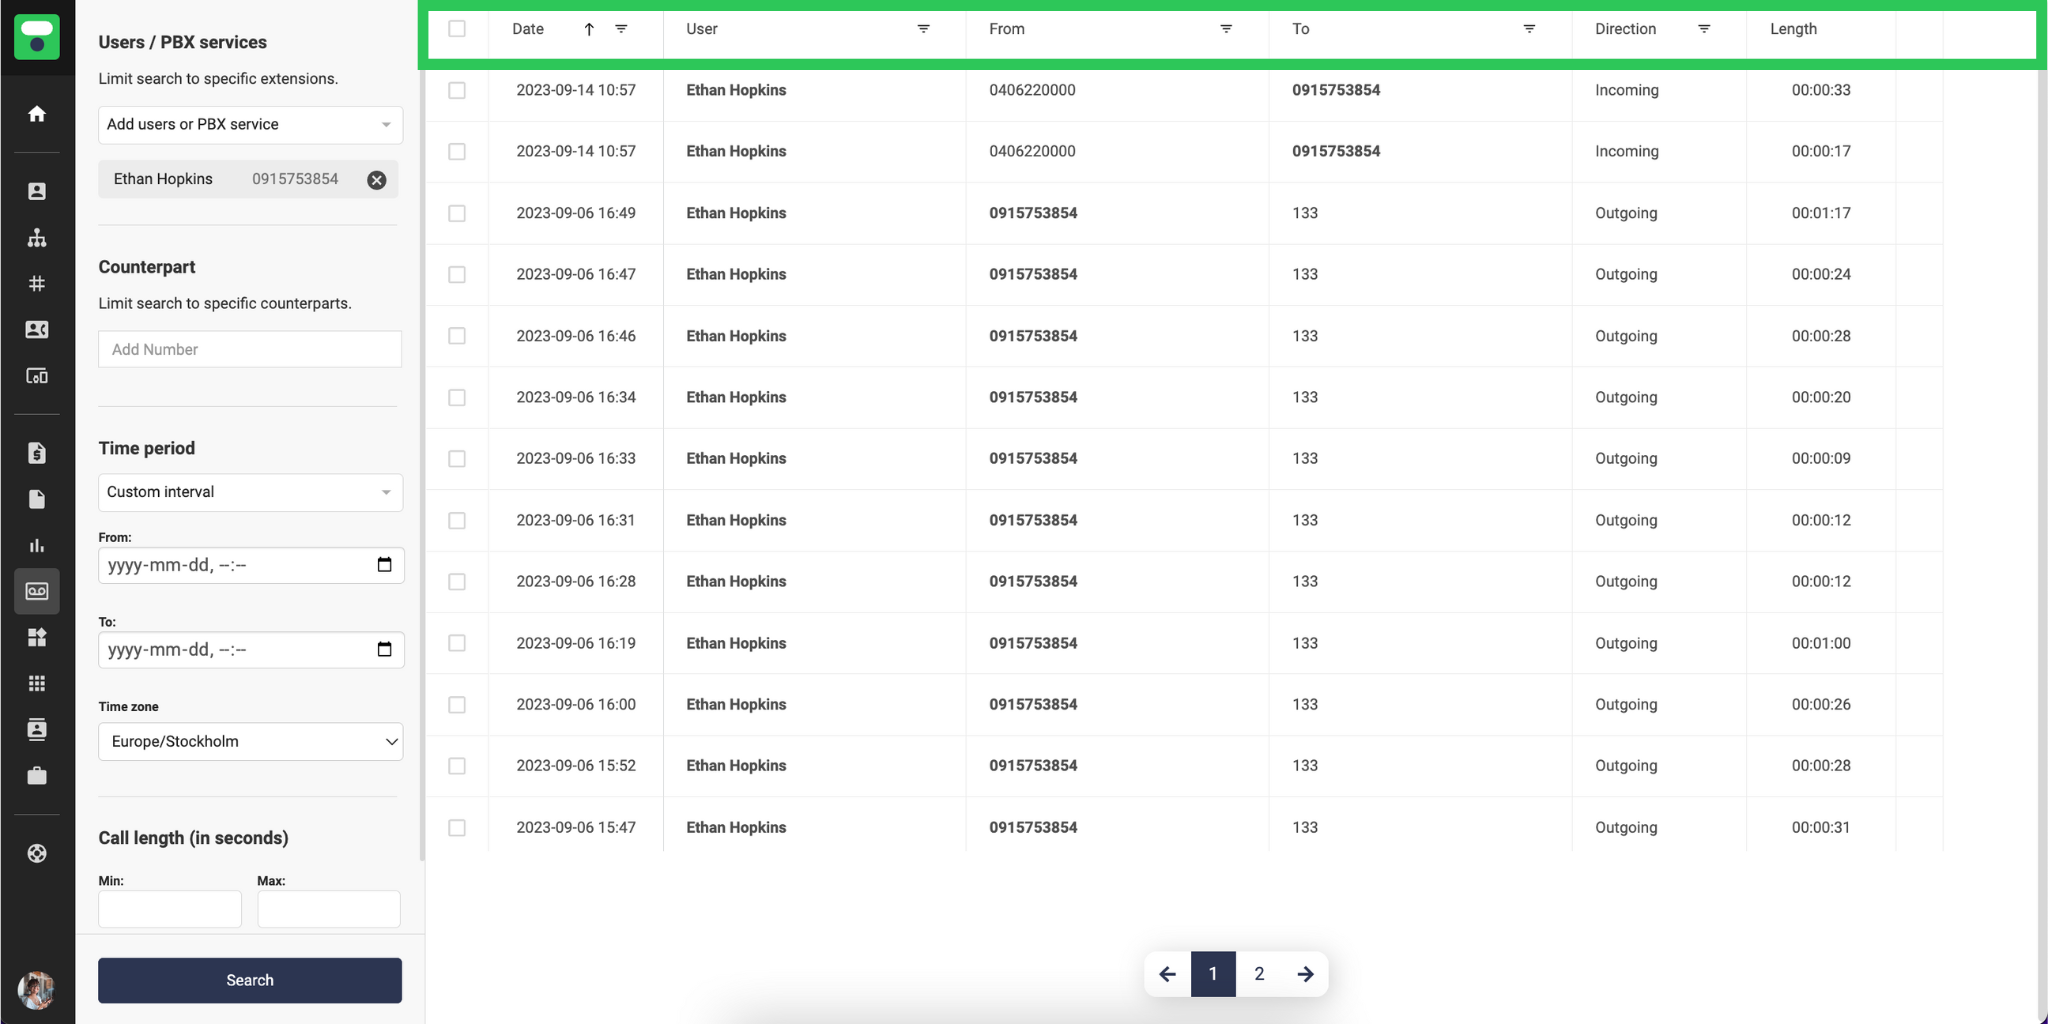
Suodatin
Päivämäärä = puhelun päivämäärä ja kellonaika
Käyttäjä = käyttäjä, jolle puhelu yhdistetään
Lähde = puhelun soittaja (käyttäjä voi olla molemmilla puolilla riippuen siitä, onko kyseessä saapuva vai lähtevä puhelu)
Kohde = puhelun vastaanottaja (käyttäjä voi olla molemmilla puolilla riippuen siitä, onko kyseessä saapuva vai lähtevä puhelu)
Suunta = onko puhelu saapuva vai lähtevä
Pituus = puhelun pituus

Nauhoitteiden lataaminen ja poistaminen
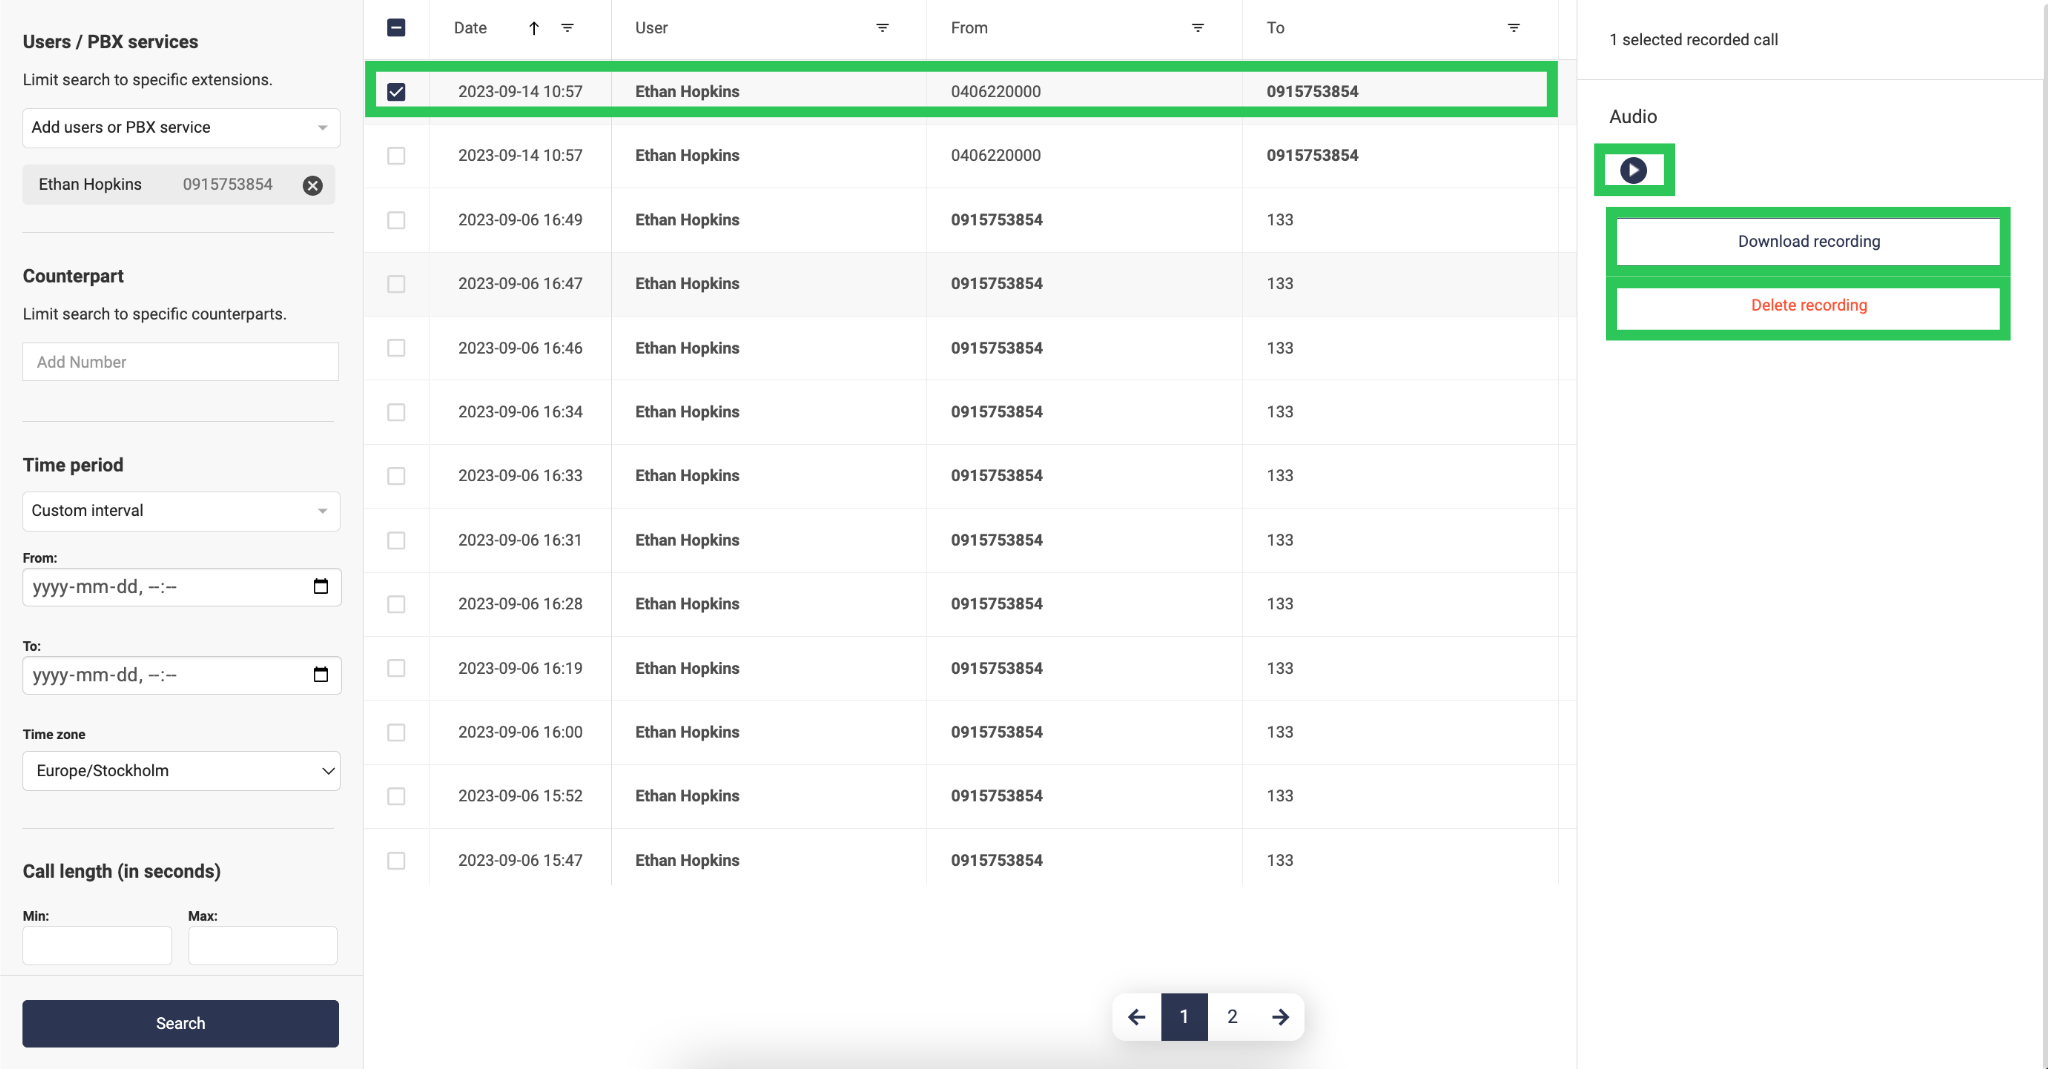
- Valitse tallenne luettelosta
- Kuuntele tallenne napsauttamalla toista-symbolia
- Lataa nauhoite
- Poista nauhoite

