Customer scenario
Many customers want to get specific information relevant to their location, but have to wait in a general queue for an agent, who then must manually route the call to the right place.
Opportunity
Providing relevant information early in the call reduces waiting time for customers and frees up agents to deal with more urgent enquiries. By using programmability, callers can hear a different pre-recorded message based on their location before involving an agent. They can then be routed to their local queue automatically.
Solution
- The caller enters postcode via their keypad.
- Set different routes for different locations, for example, a message detailing the opening hours of the nearest store or office.
- Play a pre-recorded message for the relevant location.
- If the customer still has a question, route them to the local queue number.
Click on the tabs below to get a step-by-step guide on how to Provide company info based on location in your PBX:
Get started
Prerequisites
- Advanced Nodes activated.
Create a new IVR or use an existing one
- If this is your first IVR, please refer to the support page for info on how to set up an IVR with standard nodes: How to set up your PBX services.
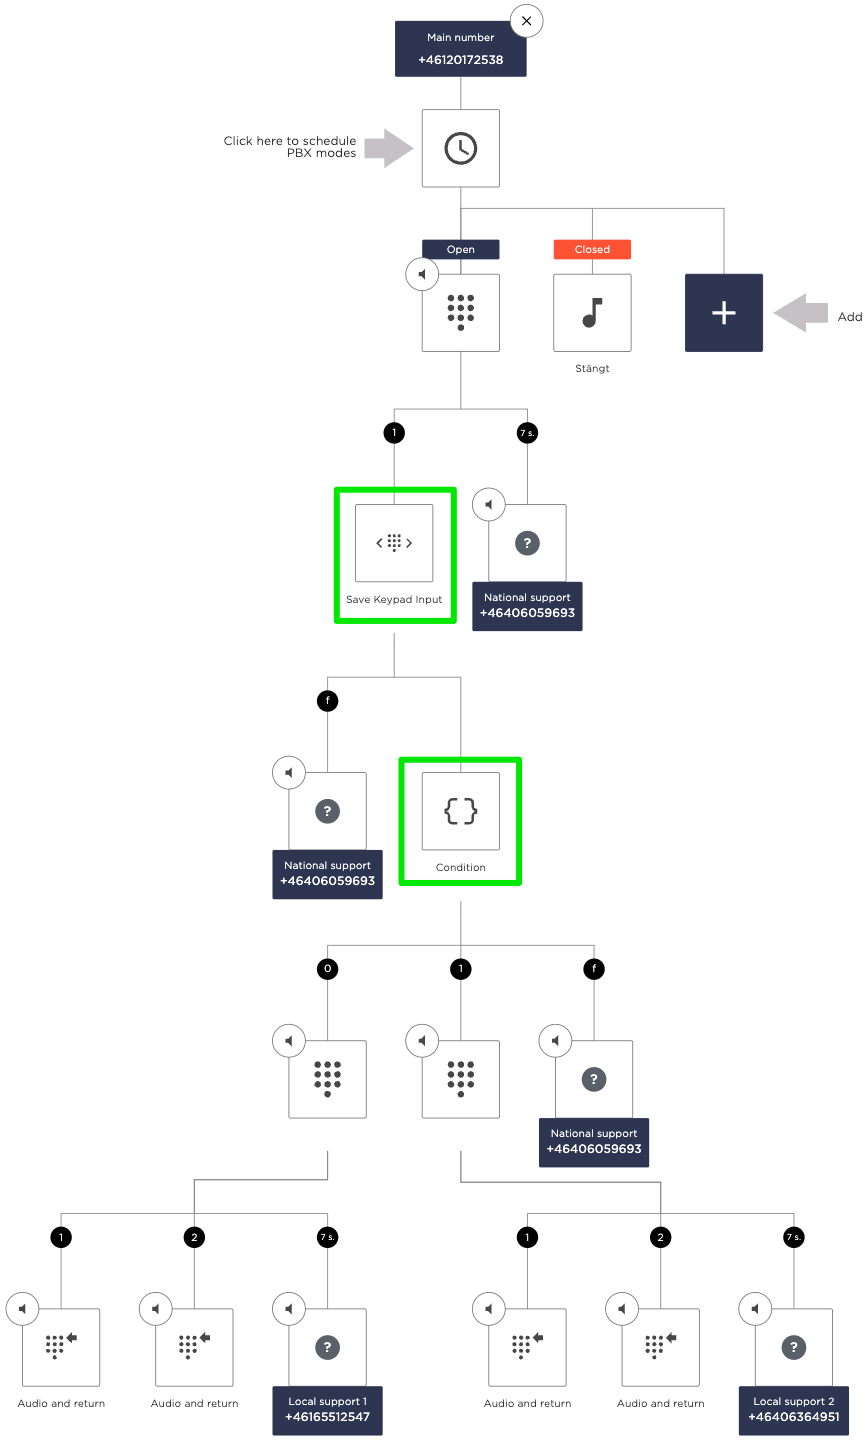
- The image to the right is an example of a complete IVR setup that caters to this use case. Use this as a reference to create your own IVR flow in the admin portal.
- The following steps will go through the setup of the Advanced nodes marked with green in the IVR flow.
Ask for caller's ZIP code
Add Save Keypad Input node
Choose an empty box in your IVR and click Advanced > Save keypad input to add the node.
This node will give the caller a chance to enter a ZIP code to receive specific local information.
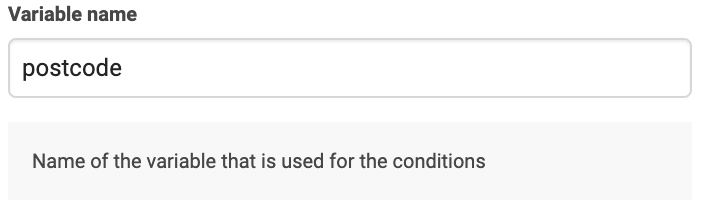
Variable name
Name of the variable where the digits will be saved, in this case we will call it postCode.

The sound that is played
Add a phrase prompting the caller to enter their postcode.
“Enter your postcode, 5 digits, and end with pound(#)“.
Since you record this sound yourselves, you can customise it however you like! 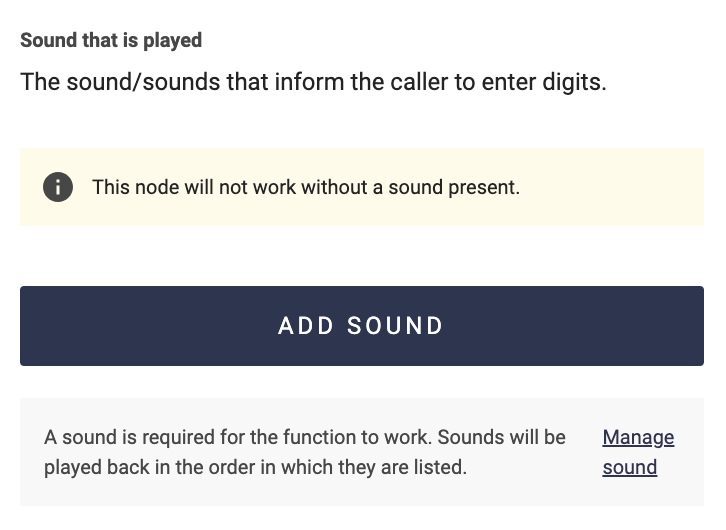
Minimum and maximum digits
Specifying how many digits a valid number must have
can make it easier to know what type of number the customer should enter.
We recommend keeping the "Require caller to end with #" checked.
 Delete
Route caller to their local information point
Add Condition node
Choose an empty box in your IVR and click Advanced > Condition to add the node.
In this node, we will route the caller in different directions depending on the postcode they entered. Once routed to their local IVR, they can, for example, get the option to:
1: Listen to a prerecorded message of the opening hours.
2: Listen to a prerecorded message about weather conditions.
7s: Wait to be routed to the queue of local agents.
If the postcode is invalid, they will be routed to the National support queue instead.
I have many IVR options but not so many postcodes. Is there a better way to set this up?
Another option for this setup is to put the IVR before the condition node. In that version, a caller who pressed 1. to hear about the opening hours will then go to a Condition node where there is one recorded message about opening hours for each postcode. So, every option in the IVR will lead to a new Condition node, which has options for all postcodes.
Variable name
Enter the name of the variable that this node should check, in this example postcode.
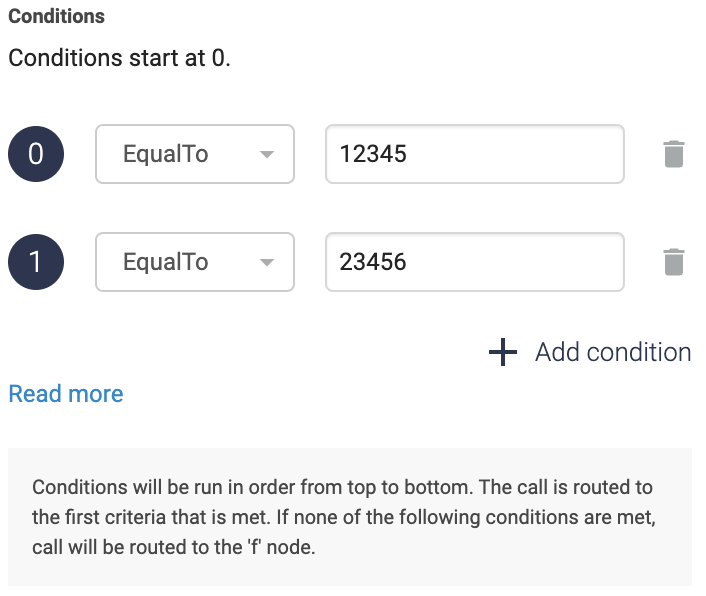
Conditions
There are several different types of conditions. Click on Read more to learn about them and choose the option that fits your needs.
In this example, we will use EqualTo for each available postcode.
EqualTo or Contains?
Choose EqualTo when the variable must match the value exactly. Contains is used when the value must be found in the variable as a part of it. E.g. +46123123123 contains +46.
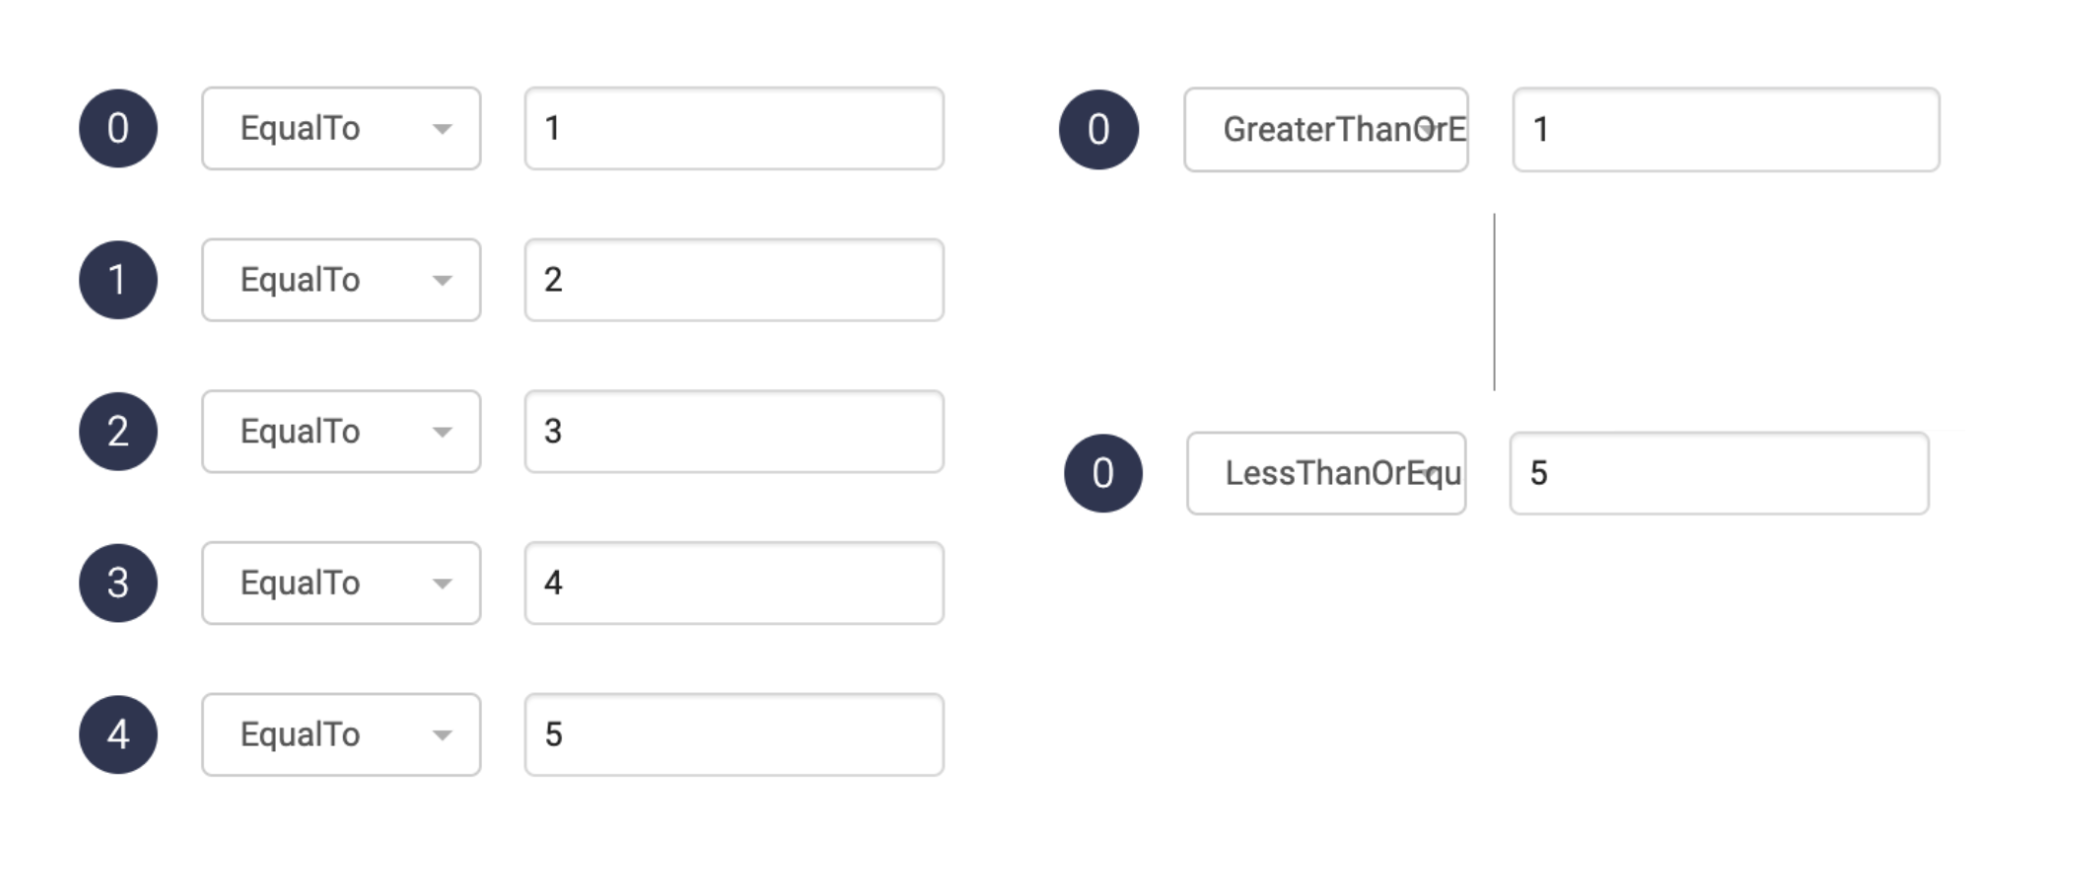
What do I do if I need to add 100 different EqualTo conditions?
Each condition needs to be added manually, but instead of adding that many conditions, there are some options to consider.
- If you find yourself needing to add 100 different conditions, you might want to create an API endpoint in your system and use the HTTP node instead. The endpoint would then receive the number and can return a corresponding response from your database, for example the number of the correct queue to send the call to.
- If you have a number series that should all have the same outcome, e.g. numbers 1-5 should all lead to the external support queue, you can use GreaterThanOrEqual and LessThanOrEqual instead of EqualTo. Use two conditions-nodes instead of one. In the first one, you choose GreaterThanOrEqual: 1. All numbers that match this condition will continue to the next condition-node where the condition will be LessThanOrEqualTo: 5. If a number passes this condition as well, you know that they are within the range 1-5 and can send them to the external queue.