
In this article, we will show you how to configure a Yealink T58 or T88 to work with a 2N IP Verso or Grandstream GDS37XX.
2N IP Verso
When integrated with 2N IP Verso, Yealink T58/T88(A/V/W) supports audio and video (JPEG).
Note: In this article we use a fixed IP on the Yealink and the 2N IP Verso. This is necessary to be able to use the video functionality. If you do not want to use this functionalities, a fixed IP is not necessary.
Connect the Yealink T58/T88 to the Telavox platform
- In the Admin portal, go to the Hardware tab.
- Click on Add hardware and add your own terminal.
- Fill in all the asked information about the Yealink T58/T88(A/V/W):
- Brand and Model
- MAC address
- Who will be allowed to make changes
- User
- Description
- Check and confirm
- Add terminal
- Factory reset the terminal
Connect the 2N IP Verso to the Telavox platform
- In the Admin portal, go to the PBX Services tab and add a Shared extension.
- Name the shared extension and assign a number to it.
- Retrieve the SIP information of the shared extension (username and password).
- Log in to the 2N IP Verso by surfing to its internal IP address.
- Go to the Phone - SIP 1 tab and register the 2N IP Verso with the retrieved SIP credentials:
- Display name: choose a display name
- Phone number: SIP username
- Domain: sip.telavox.se
- Authentication ID: SIP username
- Password: SIP password
- Proxy address: sip.telavox.se
- Registrar enabled: ✔
- Registrar Address: sip.telavox.se
-
Registration expires: 240

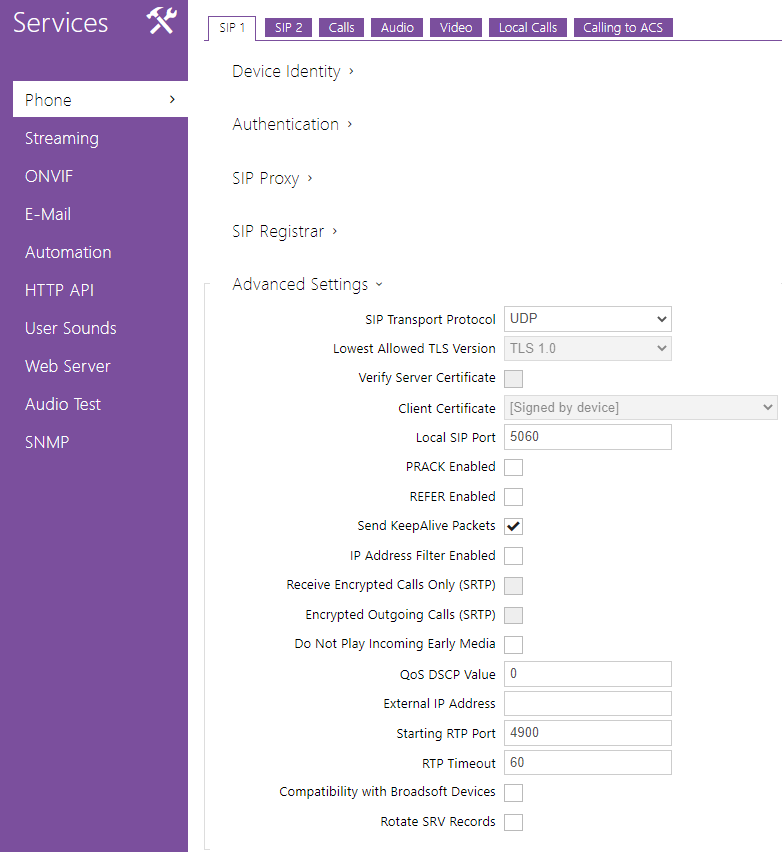
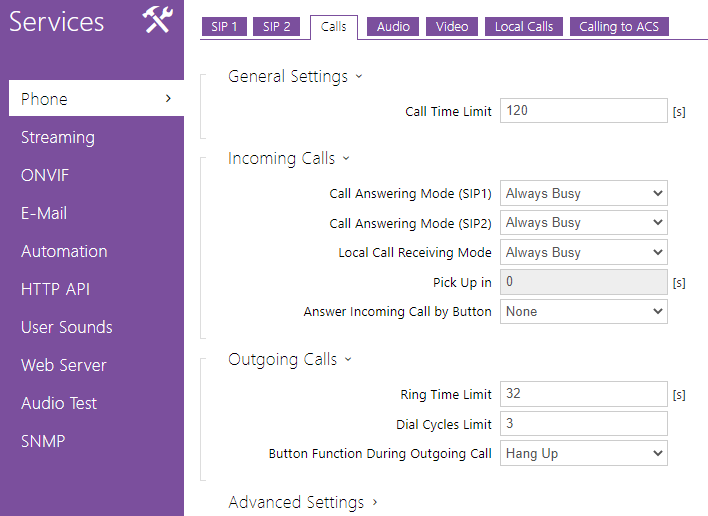
If you want to be able to call the doorphone, please set the Call Answering mode to Automatic.
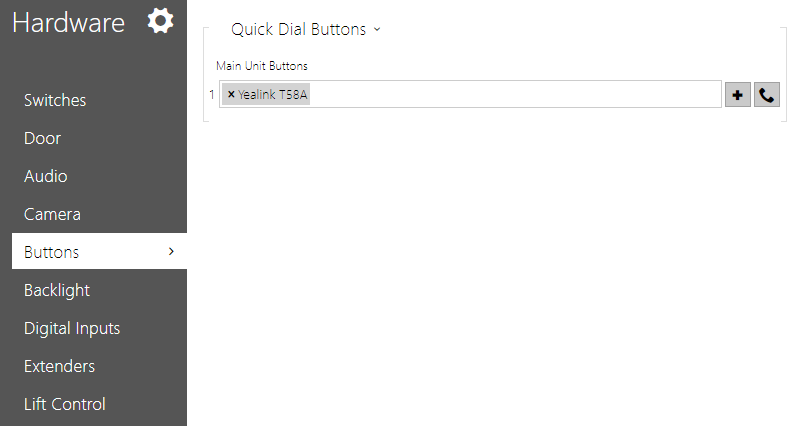
Go to the Directory page to configure the number the door phone will call. This number must be an existing number or if you want video stream the internal IP address that can be called. It should be formatted like so: sip:sipusername@localipadres:port

Go to the hardware page to configure the buttons. This will allow the door phone to make the call as you configured it.
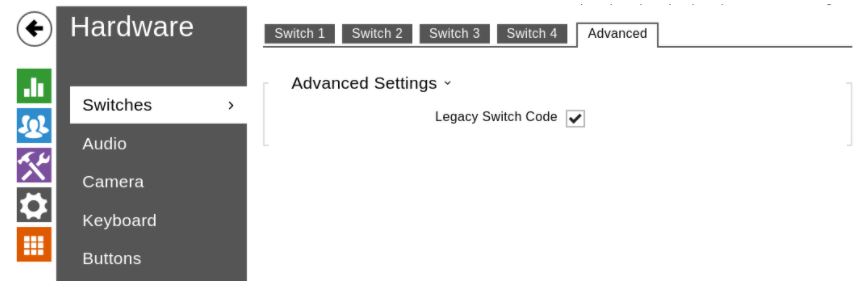
If you want to use a code to open the door, you can configure this in the switch tab.
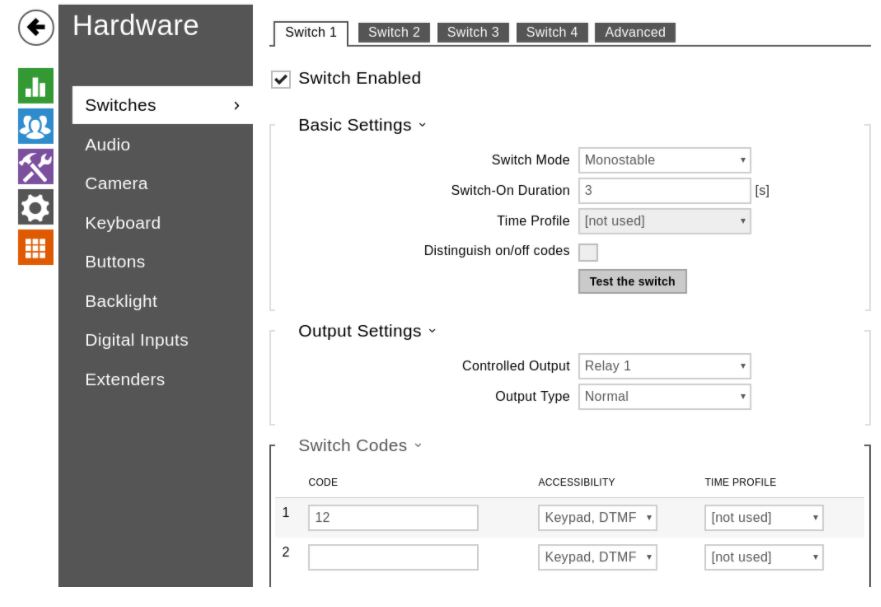
Activate the Legacy switch code to avoid using “*” before the number code to open the door.
Grandstream GDS37XX
Yealink T58/T88(A/V/W) supports audio and video (JPEG) when integrated with Grandstream GDS37XX (GDS3705, GDS3710, GDS3712, GDS3725, GDS3726, GDS3727).
Note: In this article we use a fixed IP on the Yealink and the GDS37XX. This is necessary to be able to use the video preview and the open door functionality. If you do not want to use those functionalities, a fixed IP is not necessary.
Yealink T58/T88(A/W)
1. In the Admin portal, go to the Hardware tab. Click on Add hardware and add your own terminal.
2. Fill in all the asked information about the Yealink T58/T88(A/V/W):
- Brand and Model
- MAC address
- Who will be allowed to make changes
- User
- Description
- Check and confirm
- Add terminal
- Factory reset the terminal
- Login into the Yealink T58/T88(A/V/W) by surfing to its internal IP address.
- Username: admin
- Password: (please ask your support contact)
3. Go to the Features - Doorphone tab and change the settings as in the image below

Where IP Phone number should be the internal IP of the GDS 372X,
Unlock PIN: the pincode to open the door with DTMF
4. You also need to find the Local SIP port, this can be found at Settings - SIP.

Grandstream GDS 37XX
- In the Admin portal, go to the PBX Services tab and add a Shared extension.
- Give a name to the shared extension and assign a number to it.
- Go to the Hardware tab and add the Grandstream GDS by selecting the correct model, input the MAC address and assign to the earlier created Shared extension.
- You can now provision the following configuration settings: (please ask your support contact).
Number Called When Doorbell Pressed Call Number 1:
Number Called When Doorbell Pressed Call Number 2:
Number Called When Doorbell Pressed Call Number 3:
Number Called When Doorbell Pressed Call Number 4:
Doorbell Call Out Account:
Doorbell Call Mode:
Enable Remote DTMF to Open Door:
Enable Remote SIP to Open Door:
DOOR 1 SIP Open Door Password:
Doorbell Calling Timeout(s):
Warning:
Configuring one of those settings from the WebGUI will result in a lost of the setting, as the provisioning will overwrite those changes
Other settings can still be changed from the WebGUI.
Number Called When Doorbell Pressed can be a phonenumber from a user, a queue, or Internal IP:local SIP Port of the Yealink T58/T88(A/V/W).