In Telavox Admin you are able to create and manage your own Places, Invoice places and Delivery addresses. This article will explain what these are used for and how you go about managing them.
Below you can find a short explanation of the terms that will be used throughout the guide and what they are used for.
Place
Create a Place for every address that you want to connect to an Invoice Place or a Delivery address. It´s essential to always start by creating a Place.
Invoice place
Invoice places are a way for you to split different users and services into different invoices. An example of when this can be useful is if you have different offices/locations in a company and want these to be invoiced separately. Different invoice places are also used if you have multiple countries within the same Telavox environment.
Delivery address
This is a way for you to create templates for delivery addresses which you can then assign to different users. These are then used when we are sending out SIM cards, hardware or other types of deliveries to a specified user. Different Delivery addresses are also used if you have multiple countries within the same Telavox environment.
Below we will explain how you can create and manage Places, Invoice places and Delivery addresses.
Places
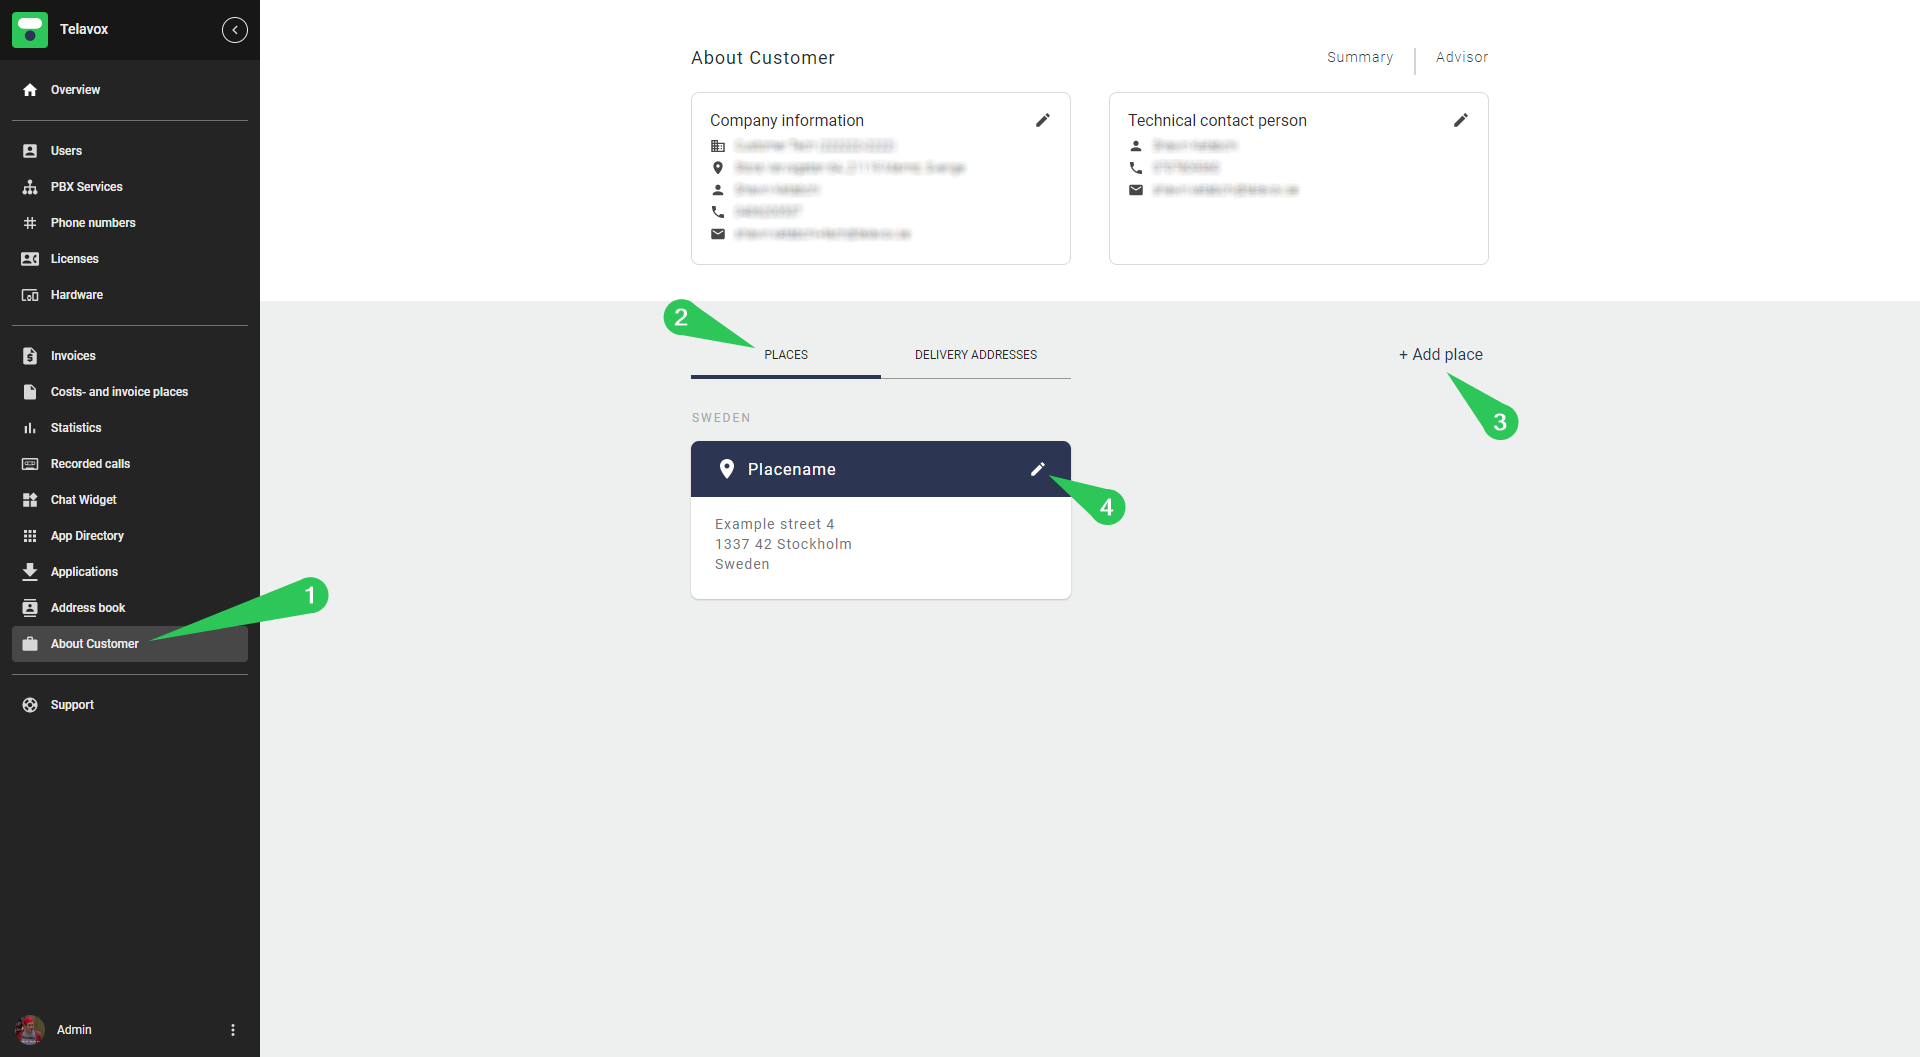
Start by logging in to Telavox Admin with an Admin account
1. Click on About *company name*
2. Click on Places
3. Click on Add place to create a new place/address
4. Click on the pen to edit an existing place/address
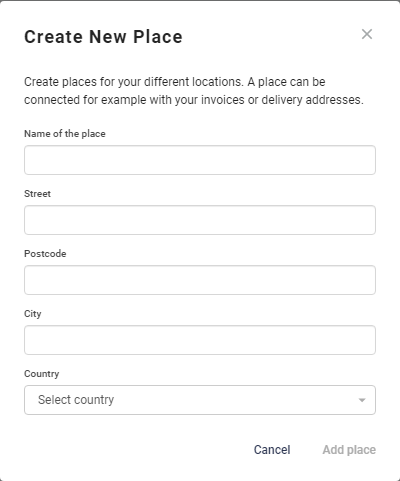
When Adding a new place (3) you will be met by the following window.
Simply give the place a unique name and address and click on Add place and it will then be saved to your list of places.
Invoice Places
Before creating an invoice place, make sure that you have created a Place with the correct address.
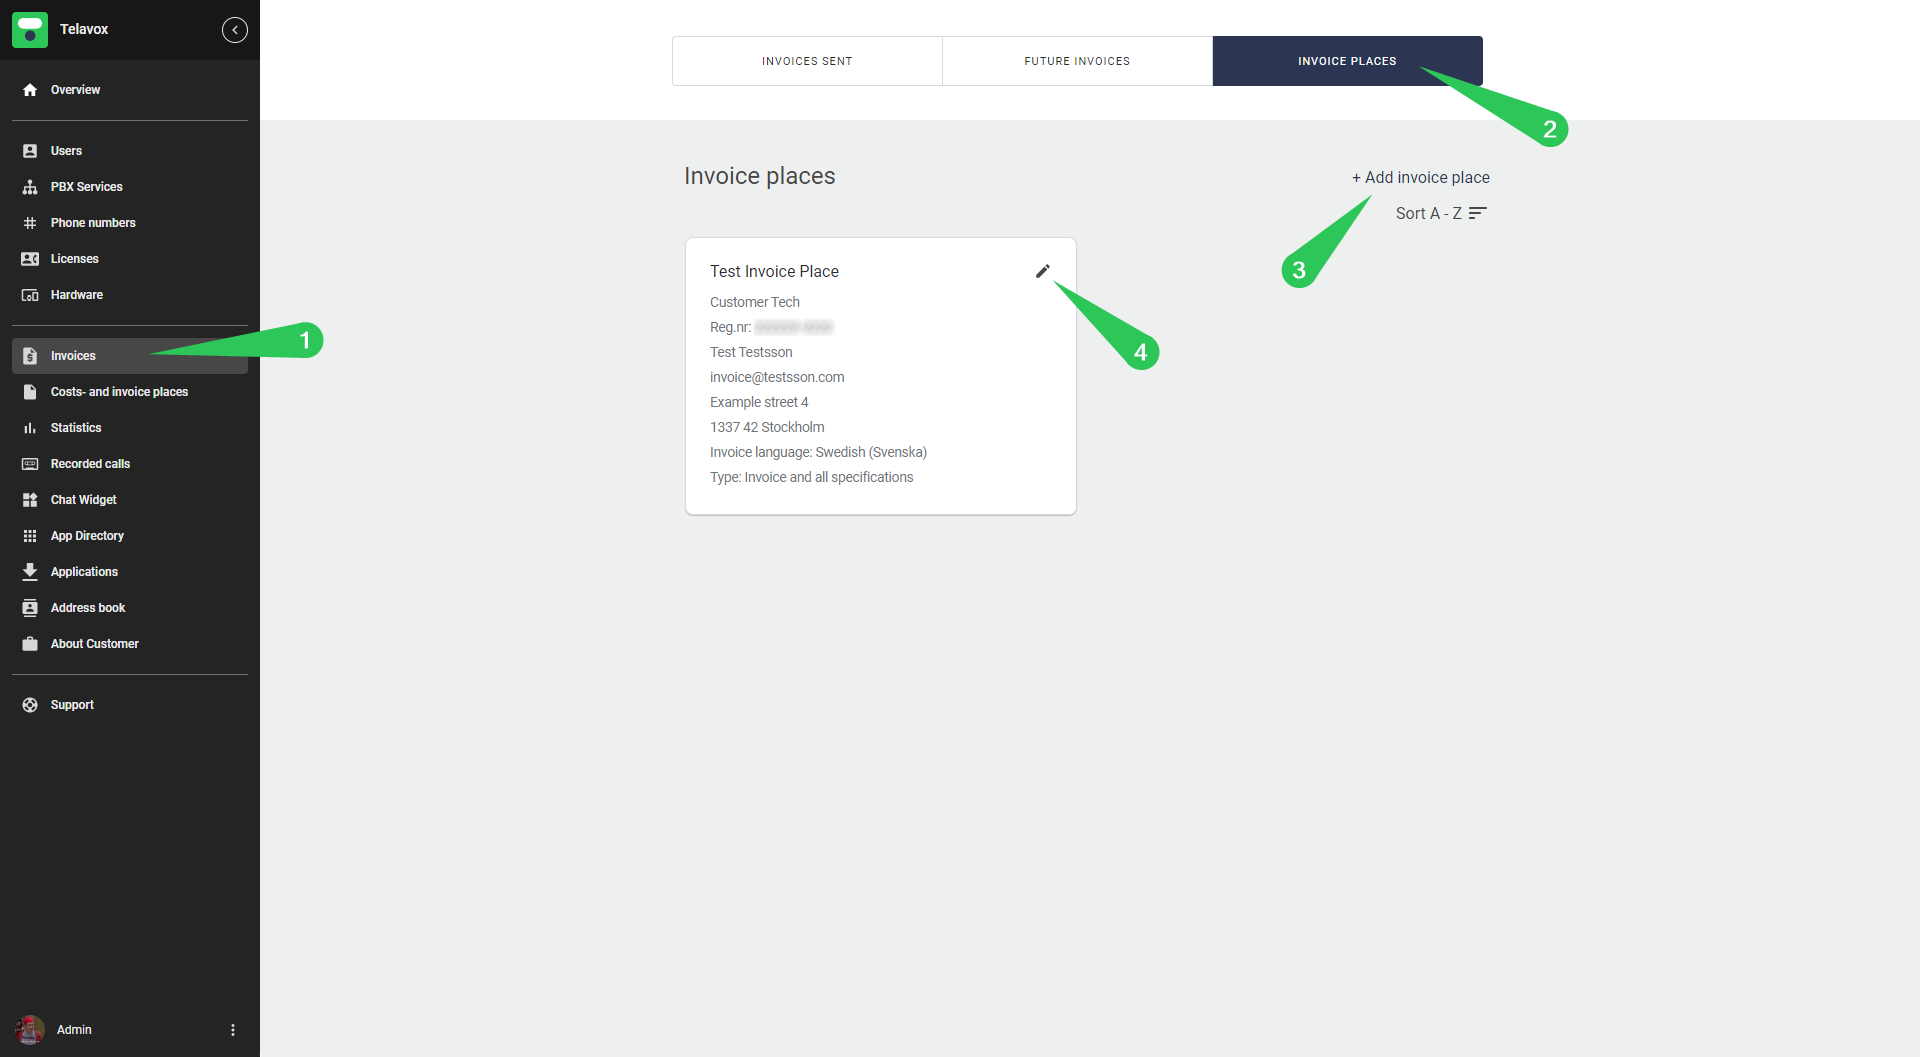
Start by logging in to Telavox Admin
1. Click on Invoices
2. Click on Invoice places
3. Click on Add invoice place to create a new invoice place
4. Click on the pen to edit an existing invoice place
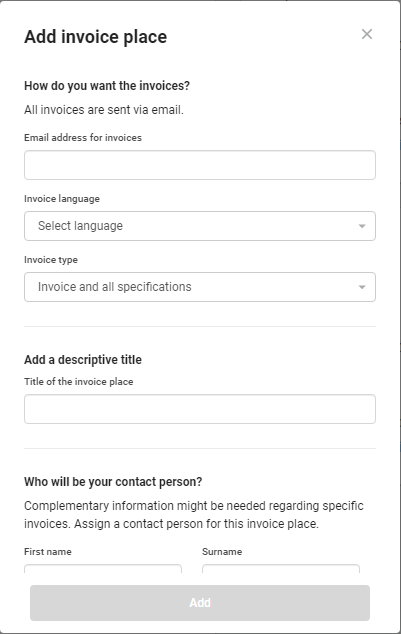
When Adding a new invoice place (3) you will be met by the following window. Please note that you need to scroll in this Window to be able to see all of the options. Here you can choose an existing invoice place as a template and edit it to save some time when creating new invoice places. Choose a country, which company that should receive the invoice and select an address (which is created via Places). After scrolling down you will be able to add an email address for the invoices, choose which language the invoice should be in and in what format (type) you want the invoice. Lastly you can add a name/title to the invoice place and also a contact person that handles the invoices in your company.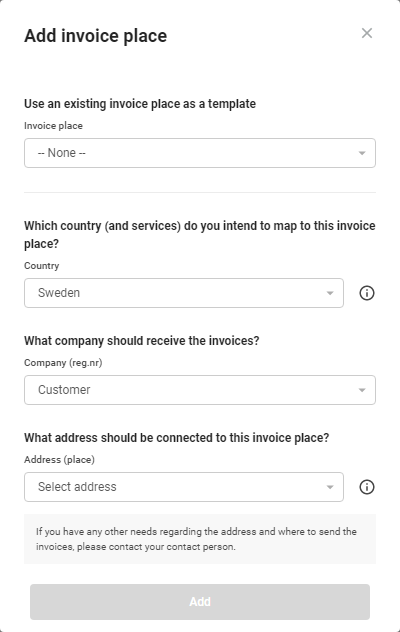
Delivery Addresses
Before creating a delivery address, make sure that you have created a Place with the correct address.
Start by logging in to Telavox Admin with an Admin account
1. Click on About *company name*
2. Click on Delivery addresses
3. Click on Add delivery address to create a new delivery address
4. Click on the pen to edit an existing delivery address
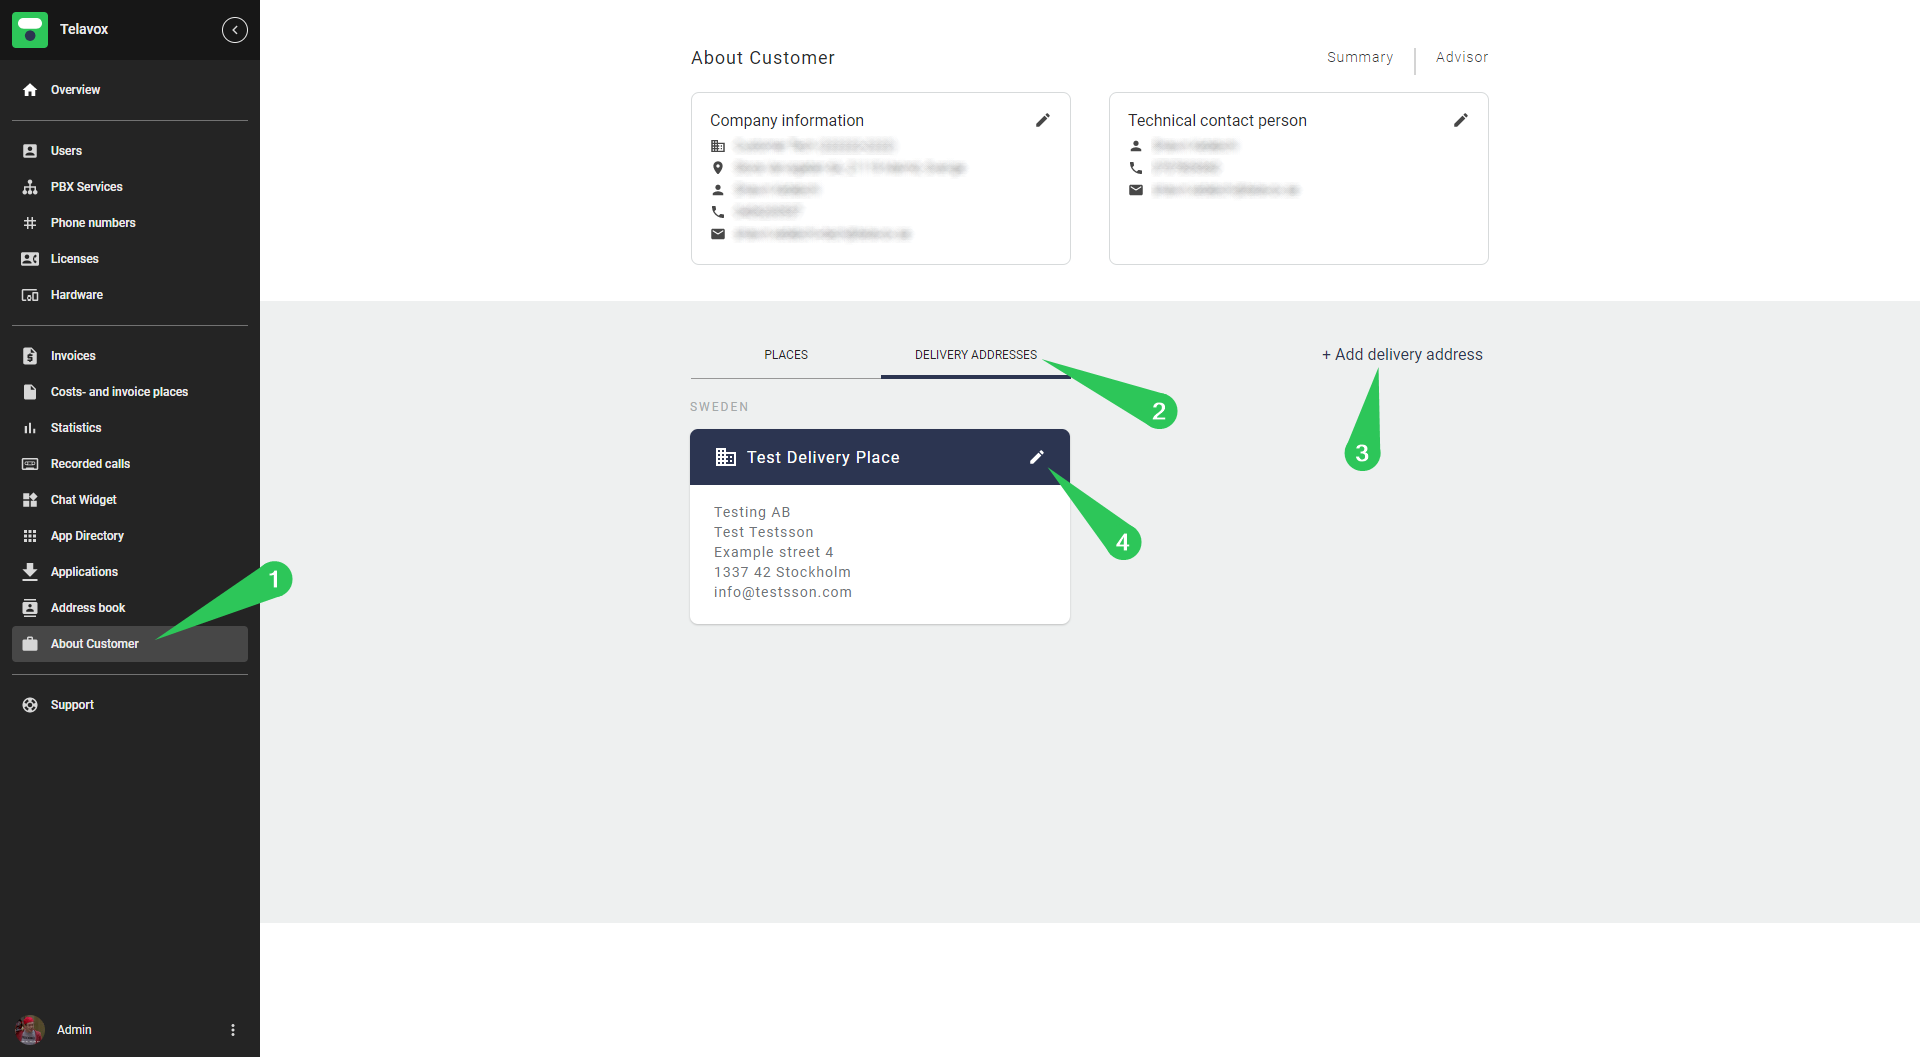
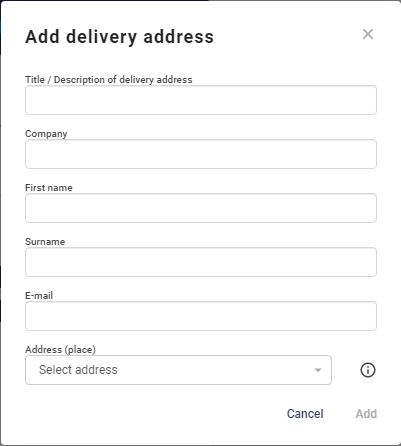
When Adding a new delivery address (3) you will be met by the following window.
Simply add a title of the delivery address, which company it belongs to, first name, surname and e-mail to a contact person and lastly a Place that you have previously created.
When you have created your Place, Invoice place and/or Delivery address you can then choose what users and services should be connected to which invoice and place.
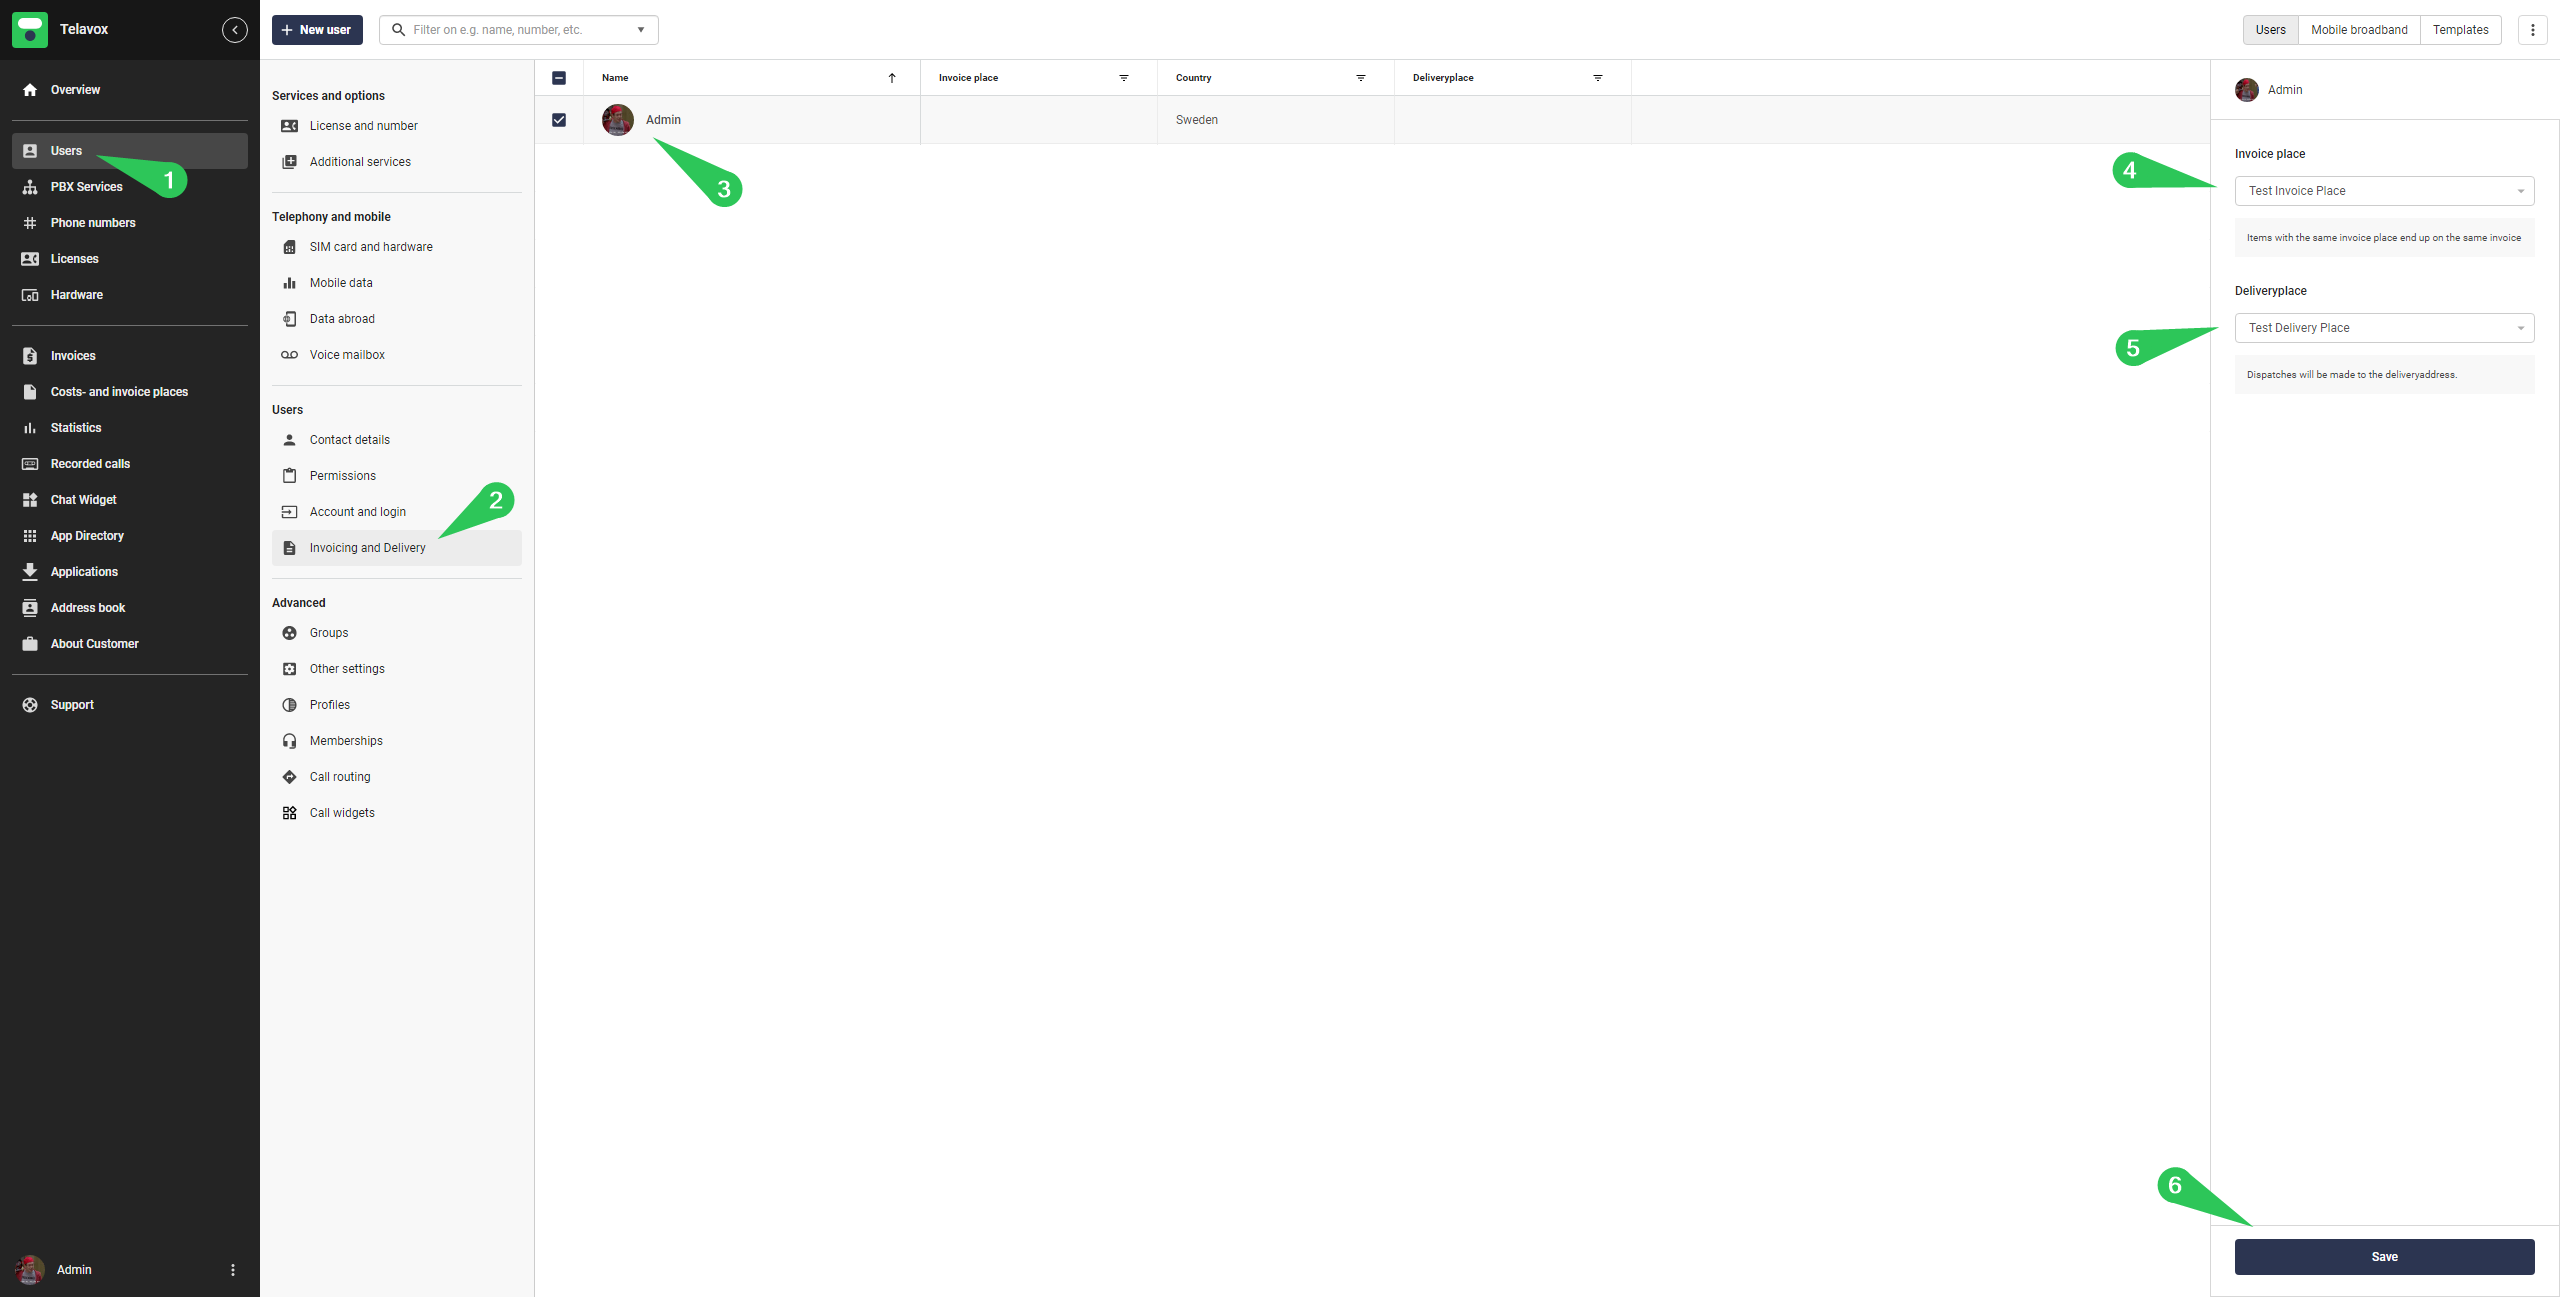
Choose Invoice and delivery place for users
1. Click on Users
2. Click on Invoicing and Delivery
3. Choose one or multiple users that you want to edit these settings on (they have to be the same country to be able to mass edit them)
4. Choose an Invoice place
5. Choose a Delivery address
6. Click on Save when you're done
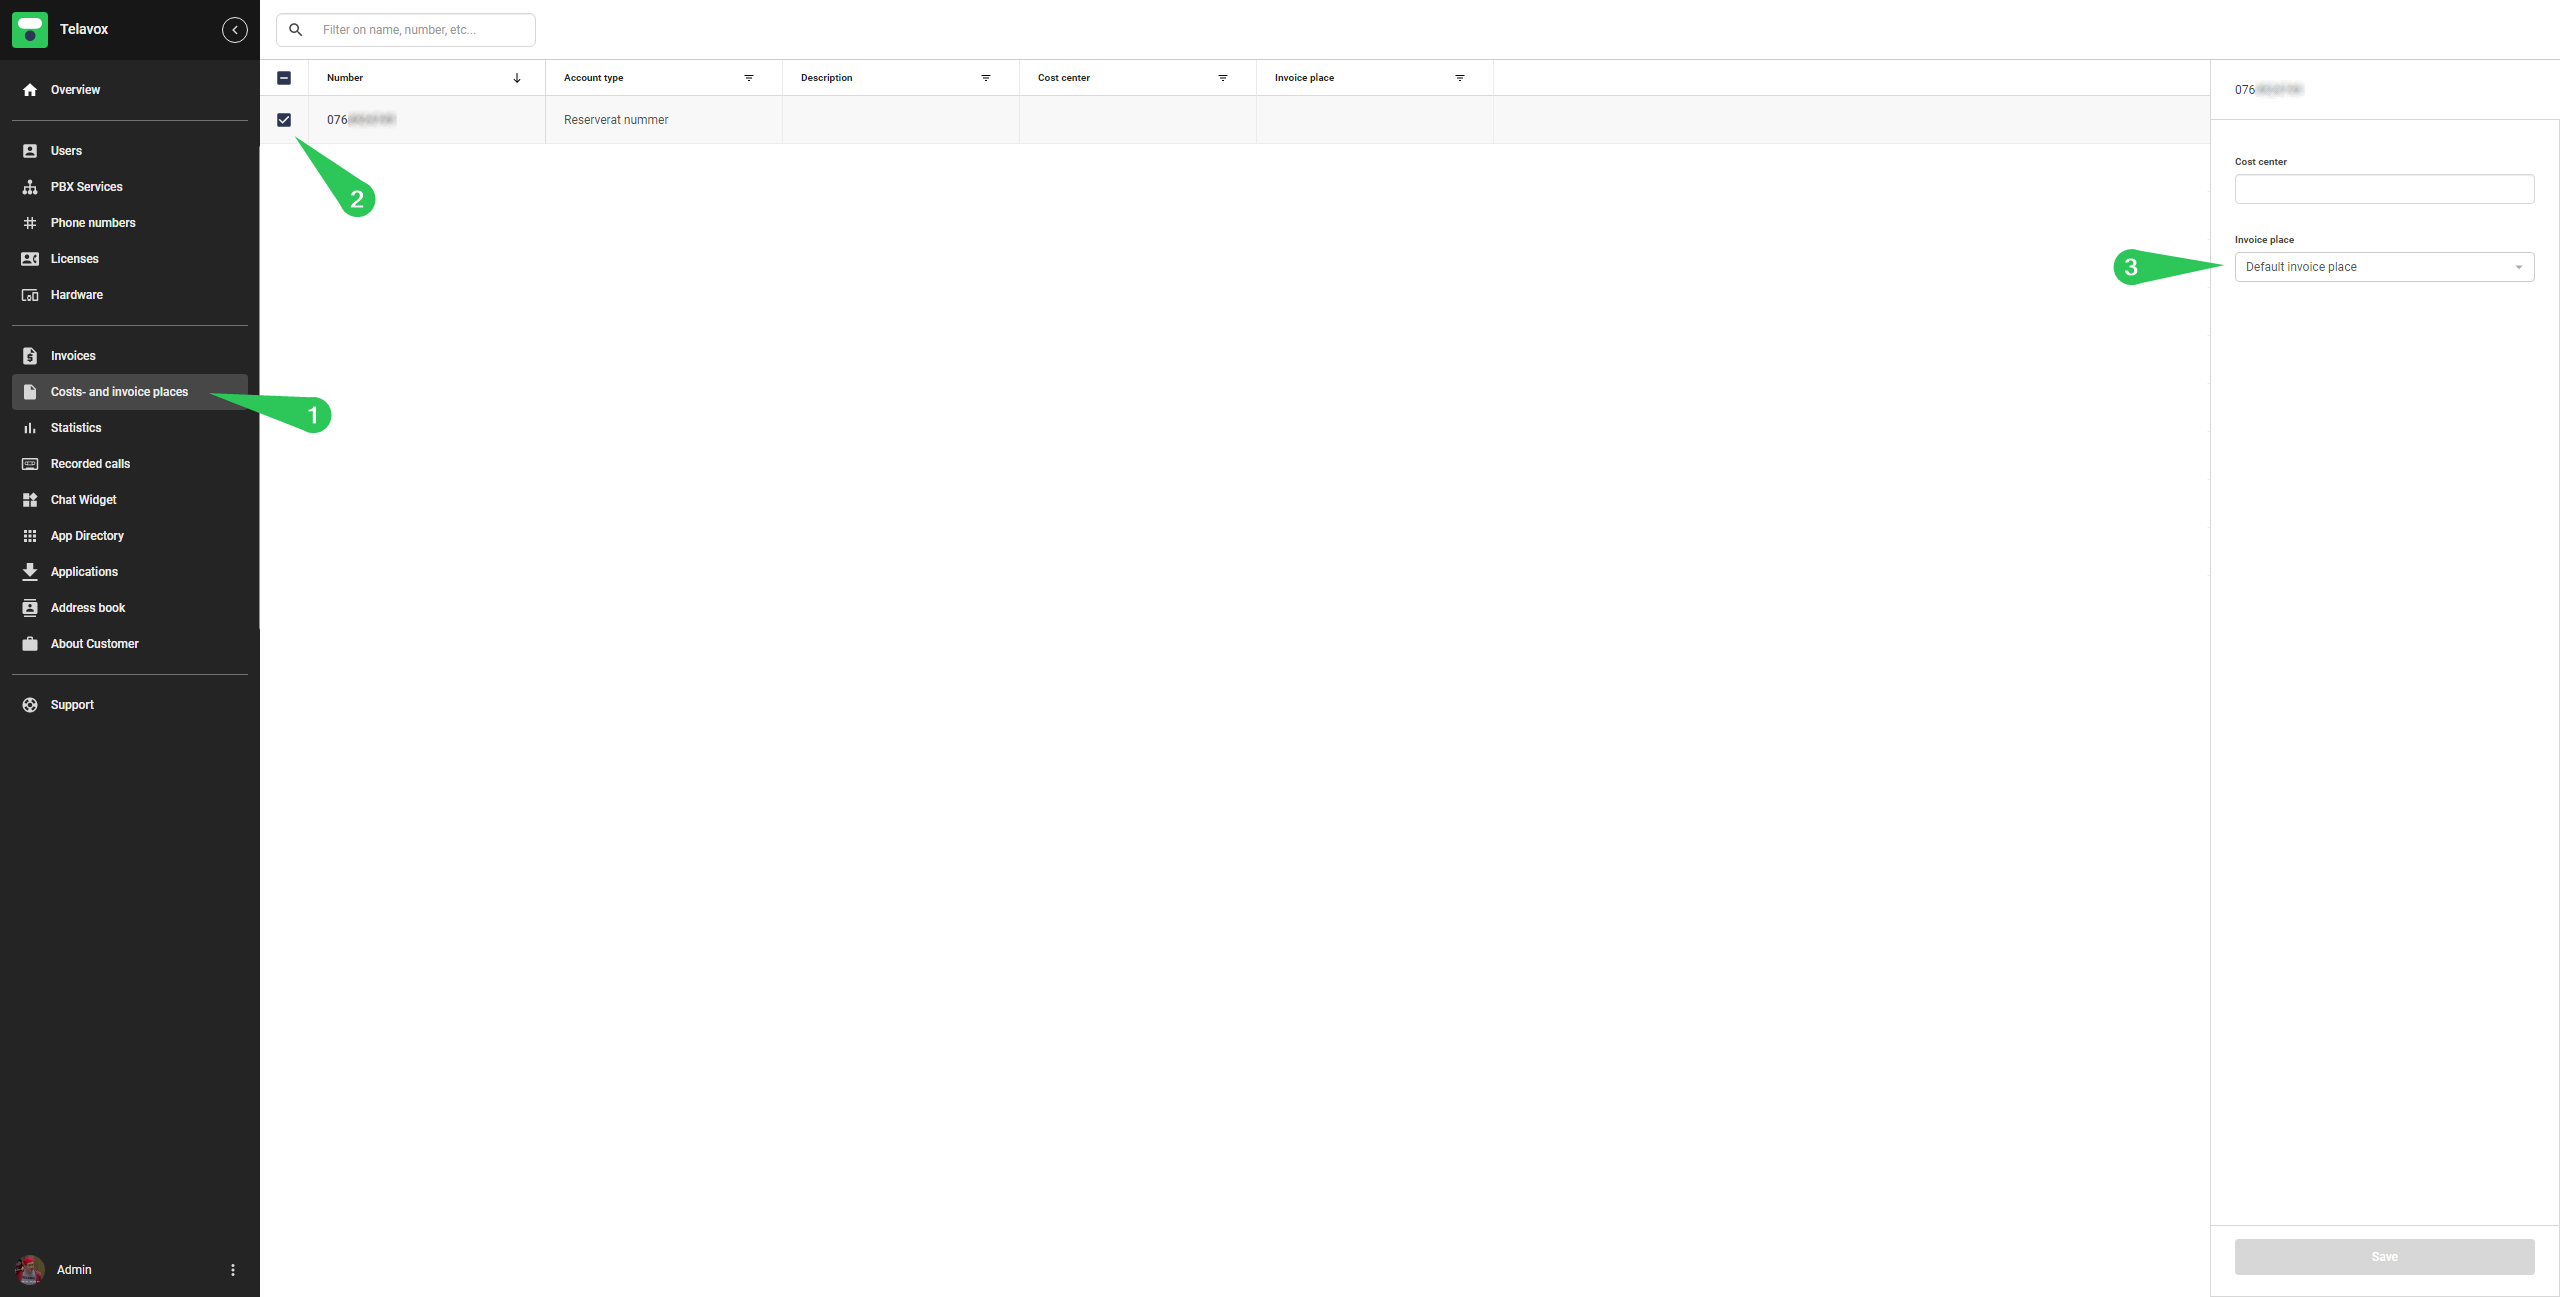
Choose Invoice place for services
(Such as Reserved numbers, PBX services and shared voicemails)
1. Click on Costs- and invoice places (To be able to access this from your user account, you need to have the Economy permission which you can read more about HERE)
2. Choose one or multiple services that you want to edit these settings on (they have to be the same country to be able to mass edit them)
3. Choose an Invoice place
4. Save your settings when you're done
